
How to Record Live Presentations with the Zoom H4 Digital Recorder
 Recording a presentation can be tricky. Not only do you face the challenge of capturing audience questions, you also usually have a PowerPoint presentation everyone is looking at, the hum and whir of a projector, and a mobile presenter who wants to walk around a room.
Although you can use a variety of digital recorders, the inexpensive Olympus digital recorders will sound a little scratchy, like sizzling bacon in a worst-case scenario. (To hear a sample recording with a higher-end Olympus digital recorder, listen to this.)
I haven't experimented with other recorders such as the Zoom H2 or Edirol or Marantz. I'm sure that any time you start spending upwards of $200 on a recorder, the sound quality increases.
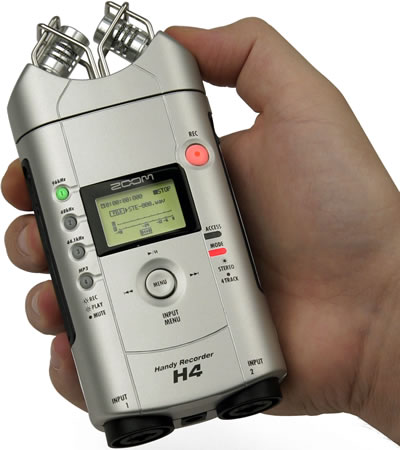
My Pitch for the Zoom H4
I like the Zoom H4 because, not only is the audio quality crystal clear, it also doubles as an audio interface for your computer. In other words, you can use your Zoom H4 as a USB mic to record Camtasia or Captivate tutorials -- and the audio quality sounds excellent.
And if you're recording in-person interviews, the Zoom's built-in mics actually record better sound than many external XLR mics (that you plug into it). But you can also use an external mic to put in front of someone. This might be preferable at times. Since the Zoom's mics are so sensitive, they'll pick up every movement of your hand on the device.
My Method for Recording Podcasts with the Zoom H4
In this post, I'm sharing the method I used to record my recent blogging and podcasting presentation to a local STC chapter. Also, since SLC podcamp is coming up, I want to document my audio recording techniques.
Gather the Necessary Equipment
- Zoom H4 Recorder ($300)
- Omnidirectional lapel microphone ($95)
- SP Zoom Phantom Adapter ($80)
- Gigavox Levelator (free)
- Audacity (free)
- One Pixel Out Audio Player (free)
- 2 GB SD Memory Card ($40)
- Custom-modified large belt clip (impossible to buy)
- WordPress blog software (free)
- Web host (such as Blue Host) ($7/month)
- Kimili Flash Embed WordPress plugin (free)
- Camtasia Studio ($300)
You might want to spend a couple of days getting familiar with the Zoom H4. Don't worry about any of the four-track capabilities.
Tip: I recommend buying your audio equipment from The Sound Professionals. They have a lot of custom adaptors and peripherals that you may need, and the sales people have expertise with audio in case you have questions about what to buy.
Set Up and Record the Audio
- Insert the 2 GB SD memory card into the Zoom.
- Set the Zoom to record in WAV format.
- Activate the Zoom's phantom power to +48 volts.
- Set the Zoom's input to the omni microphone rather than the built-in mics.
- Connect the phantom adaptor to the Zoom.
- Connect the omnidirectional lapel mic to the phantom adaptor.
- Slide the Zoom into your custom-sewn large belt clip and attach to your belt. Clip the lapel mic a couple of inches below the presenter's chin.
- Make a big sign that says "Please repeat the audience's question."
- Each time the audience asks a question, raise the sign you made in step 8.
Process and Post the Audio
- Use the Zoom's "Connect to PC" option to transfer the audio file to your computer.
- Import the file into Audacity and convert the file from stereo to mono (split the stereo track, and then remove one of the tracks). If your omni mic records in mono by default, disregard this step.
- Export the file into a WAV format.
- Run the file through the Gigavox Levelator.
- Import the levelated file into a new Audacity file, make any modifications, edit the ID3 tags, and export as MP3.
- Upload the MP3 to your web host.
- Use the One Pixel Out Audio player to publish the file on your WordPress blog.
Note: The One Pixel Out Audio player also works on non-WordPress platforms, but the set up requires more labor.
Optional: Record Your PowerPoint During the Presentation
These instructions apply if you're the presenter and you have Camtasia on your own laptop.
- To record your PowerPoint, use the "Record PowerPoint" feature that Camtasia provides (but don't record audio).
- Disable the blinking rectangle and set the cursor to not record layered windows. I believe you do this through Tools > Options once the little recording dialog box appears.
- Start recording the screen when you're about to begin.
- After the presentation, stop and save the PowerPoint recording.
- Import the audio from the Zoom H4 and add it as the audio 2 track to the Camtasia recording.
- Line up the audio with the slides so that they're in sync. You may have to lock one of the tracks while you cut some of the screen or audio.
- Publish the recording as an Express Show template, using an extremely low frame rate, such as 1 or 2.
- Use the Kimili Flash Embed WordPress plugin to embed the Camtasia recording directly into your blog post. (If you choose another publishing format other than Express Show, which consolidates the entire flash file into one SWF, the recording won't embed in the Kimili Flash Embed WordPress plugin.)
Optional: Record a Presenter's PowerPoint with the Audio
If you're not the presenter, and the presenter doesn't have Camtasia Studio, you can use Presio to sync the audio to the PowerPoint after the presentation. See http://ipresent.net for more information. This tool costs about $89 for the standard version, and you would have to rewatch the presentation, but it's about the only tool on the market that does this. (MS Producer used to have a PowerPoint plugin that allowed you to do this, but it was discontinued.)
Things to Watch Out For
- The presenter often will forget to repeat the audience's question, so the result will be long stretches of silence followed by responses that make the podcast listener guess what the question was.
- For some reason, my omnidirectional stereo mic recorded more strongly on one track than another. Consequently, when I levelated the file, it sounded strange, gathering strength on one side at times more than another, kind of like being tossed around in a windstorm. I split the stereo track, removed the weaker one, and then converted the other to mono. When I levelated the file again, it sounded much better.
- Levelating a file intensifies the background noise. Presenters usually stand right next to noisy projectors that have fans blowing. When you levelate the file, this fan sounds a lot stronger. You may be able to use SoundSoap to remove the hum, but I'm not sure. I haven't experimented much with SoundSoap yet since it is somewhat expensive.
- You don't have to levelate the file, but I think the levelator makes the voice sound richer and more professional. Using the omni mic without levelation leaves the voice sounding a little flat and unexciting. Additionally, levelating the file increases the audio's sound level as well.
- There is no belt clip for the Zoom H4. Although this device is intended as a mobile recording device, it doesn't come with a case or portable carrier of any kind. I found an old belt clip for a large cell phone, the kind that has elastic sides. The Zoom just barely fit into this. Then I cut the bottom elastic to allow space for the sp phantom adapter and omni mic. I have looked around at Best Buy, Radio Shack, Circuit City, and The Clip for a suitable belt clip, but have not seen anything that would fit. However, my mother-in-law is a killer seamstress and I'm hoping she'll show me how to custom-create a belt clip out of old materials.
- The Zoom H4 is bulky and is a bit like a taser, so your presenter may feel weird allowing you to clip it onto him or her. It immediately draws attention to itself and looks dorky.
- If you choose to record in MP3 format on the Zoom, and your recording environment is extremely quiet, you can hear the LCD light blinking during the recording (due to a defect in the manufacturing of the device). This is why I always choose to record in WAV format. When you record in WAV, you need a 2 GB SD card so you don't run out of space. Speaking 75 min, I used 815 MB of space.
- Make sure your batteries are fresh. The Zoom doesn't give you any kind of auditory warning about low batteries, and if you're using the phantom power, it only powers the device for about 3 hours, I think.
- Don't spend hours editing your audio file, or you'll burn out. One time a friend of mine spent 11 hours cleaning up the audio of a recording. He never edited an audio file after that, complaining that he did not have the time to do it.
- Don't use PodPress to publish your audio. Every time WordPress requires an upgrade, PodPress breaks. Plus it doesn't give you that many benefits that the One Pixel Out Audio Player doesn't already provide.
Post-Notes
- Photo from O'Reilly (no, that's not my hand)
- Last year I wrote about how to record chapter presentations, but I didn't explain the Zoom H4 method.
- I'd be interested to hear your method for recording presentations.
About Tom Johnson

I'm an API technical writer based in the Seattle area. On this blog, I write about topics related to technical writing and communication — such as software documentation, API documentation, AI, information architecture, content strategy, writing processes, plain language, tech comm careers, and more. Check out my API documentation course if you're looking for more info about documenting APIs. Or see my posts on AI and AI course section for more on the latest in AI and tech comm.
If you're a technical writer and want to keep on top of the latest trends in the tech comm, be sure to subscribe to email updates below. You can also learn more about me or contact me. Finally, note that the opinions I express on my blog are my own points of view, not that of my employer.