
My process for creating vector diagrams with Illustrator
- Create the file in Adobe Illustrator
- Setting up artboards
- Get Graphics from The Noun Project
- Save the AI as an SVG
- Embed the SVG on Your Page
Create the file in Adobe Illustrator
Adobe Illustrator is my preferred tool for creating diagrams, conceptual workflows, or any other graphic that’s not a screenshot. This is because Illustrator creates vector graphics, whereas other applications (e.g., Snagit, Photoshop) create raster graphics.
Vector graphics are actually XML files that are mathematically drawn, whereas raster graphics are pixel-based images (little dots). Raster graphics look good at the dimensions you create them at but get fuzzy if you resize them. In contrast, vector graphics look sharp at any resolution, so they’re much more flexible.
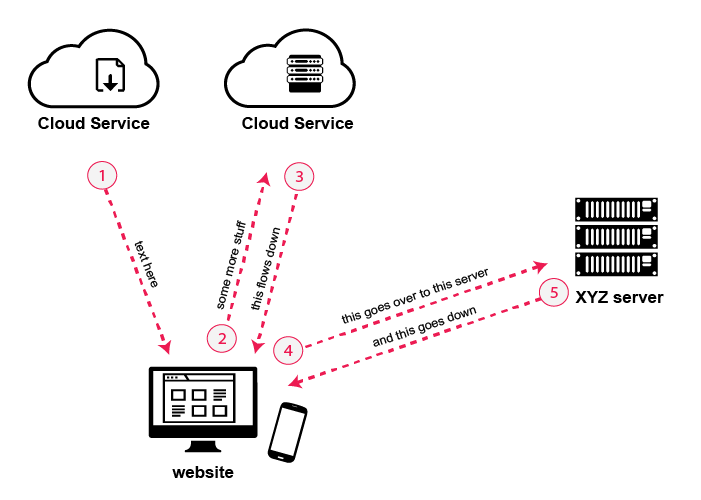
Here’s a sample. This is a vector graphic (SVG):

And this is a raster graphic (PNG):
They look almost identical, really. But the vector graphic is slightly sharper.
For fun, try shrinking the browser size to a mobile device width. You’ll see the images get smaller (not just cut off).
By the way, to make image scale when you shrink your browser, add this to your stylesheet:
img.shrink {
    max-width: 100%;
    max-height: 100%;
    }
Then add the class shrink to any image that you want to shrink like this when then browser resizes. (You might not want to add the class to all images, though, because if you have a 400px image in an 800px container, the image will expand to 800px.)
Also note that SVG graphics will fill their containing element regardless of the artboard size you use in Illustrator. As a result, I’ve added a max-width of 700px as an inline style here for the vector graphic.
Setting up artboards
In Illustrator, I create a file for my project such as acme.ai. On acme.ai, I add numerous artboards (e.g., a dozen or so) and size all the artboards to 700 x 500 px wide.
New to Illustrator? Here’s a great intro to artboards.
Within the Illustrator file, I create custom names for each of the artboards. When I save the file as an SVG file, each of the artboards will get saved as its own file. For example, if the filename is “acme.ai” and the artboard name is “workflow,” then the SVG file will be named acme_workflow.svg. This way I can keep updating the artboards at any time and just save to SVG at the end — the updated graphics will overwrite any previous versions.
I could simply use different ai files for each graphic, but it would make it a little less convenient for re-using the same illustrations in different diagrams. If I make a change to one graphic (e.g., a color), I often want to make the same change to the other graphics as well.
Get Graphics from The Noun Project
As for graphics, I think they be simple and minimalist. My favorite source for vector graphics is The Noun Project:
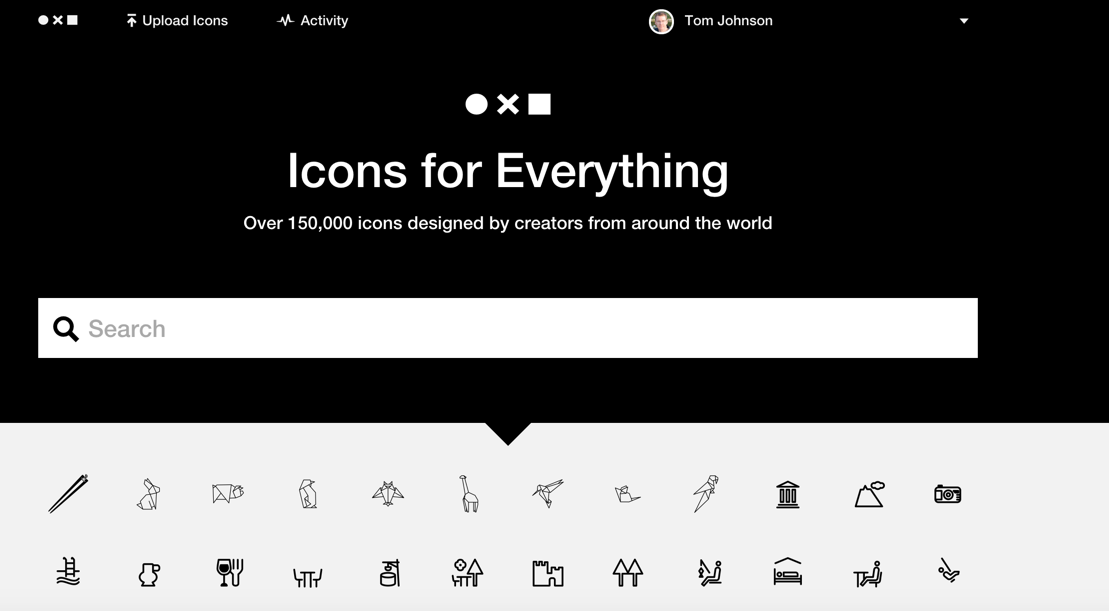
As long as you attribute the graphics from The Noun Project, they’re free (otherwise it costs $100/year). What’s great about the Noun Project is that the icons, being minimalist, all fit together thematically. And there are about 150,000 of them.
If I need a more sophisticated vector graphic, I look at Vecteezy. But for the most part, with technical documentation, you just need simple little graphics for workflows and concept illustrations.
Save the AI as an SVG
To save the Illustrator file as an SVG, you don’t use Export. Instead, you use File > Save As and choose SVG.
When you choose to Save As an SVG, you’re presented with a dialog box that looks like this:
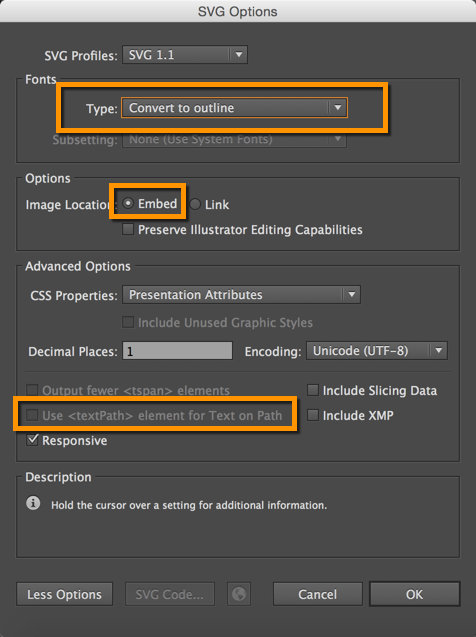
The dialog box has a lot of options, but I’ve highlighted the sections I want to comment on.
In the Fonts box, select Convert to Outline. This ensures that all browsers will support your fonts. Note that Firefox doesn’t support font family styles for SVG graphics.
In the Image Locations option, select Embed. If you select “Link,” then you end up with various graphics files for your SVG image.
In the check boxes, remove the check box from “Use
Embed the SVG on Your Page
Now it’s time to insert the SVG on your page. You can treat it just like an image:
<img src="https://s3.us-west-1.wasabisys.com/idbwmedia.com/images/samplevectordiagram.svg" alt="Sample vector graphic" style="max-width: 700px" />
Vector graphics provide a lot of possibilities beyond just simple diagrams here. You can also add animation, link different elements, and do a lot of other things with graphics. However, you can also just create simple workflow diagrams, like I’ve shown here.
What’s especially convenient with AI files is that they’re always editable, so you can change the text or shapes at any time. Your file doesn’t get locked down in a static format.
About Tom Johnson

I'm an API technical writer based in the Seattle area. On this blog, I write about topics related to technical writing and communication — such as software documentation, API documentation, AI, information architecture, content strategy, writing processes, plain language, tech comm careers, and more. Check out my API documentation course if you're looking for more info about documenting APIs. Or see my posts on AI and AI course section for more on the latest in AI and tech comm.
If you're a technical writer and want to keep on top of the latest trends in the tech comm, be sure to subscribe to email updates below. You can also learn more about me or contact me. Finally, note that the opinions I express on my blog are my own points of view, not that of my employer.