
DITA: Hello World getting started tutorial
- Download OxygenXML.
There are 3 flavors: Editor, Developer, and Author. Unless you intended to get heavy into XML development, just choose Author. The Developer and Author versions just provide different perspectives of the same application.
- Create a folder on your computer where you can easily organize and access your
files.
If you're on a Mac, I recommend that you use the /users/<username>/projects folder, since this is the default folder when you clone a repository.
- Go to .
- Expand the and choose Topic.
Once you choose a template here, your choices will appear under a "Recently Used" section so you don't have to browse so many folders next time.
- In either the Author or Text view, create some content. For example, if you're in the
Text view, you might create
this:
<?xml version="1.0" encoding="UTF-8"?>
<!DOCTYPE topic PUBLIC "-//OASIS//DTD DITA Topic//EN" "topic.dtd">
<topic id="topic_vm3_v3z_bq">
  <title>Hello World</title>
  <body>
    <p>This is my first help output. Hooray!!!</p>

  </body>
</topic>
In either view, note how Oxygen will prompt you with options. In the Author view, hit your Return key to see a list of elements you can insert at a particular point.
- Save the file and called it
hello_world. - Go to and expand the , and choose DITA Map.
- Save the DITA map. Call it something like
sample. Note that the extension will be.ditamap. - In the DITA Map, add the bold text shown below (the rest should already be populated
there):
<?xml version="1.0" encoding="UTF-8"?>
<!DOCTYPE map PUBLIC "-//OASIS//DTD DITA Map//EN" "map.dtd">
<map>
 <title>DITA Topic Map</title>

 <topicref href="hello_world.dita"/>
</map>
Note that once you save your DITA map file, when you type
href=", the editor will show you available topics within the folder. - While viewing your DITA map file, right-click the tab and choose Open in DITA
Maps Manager View.
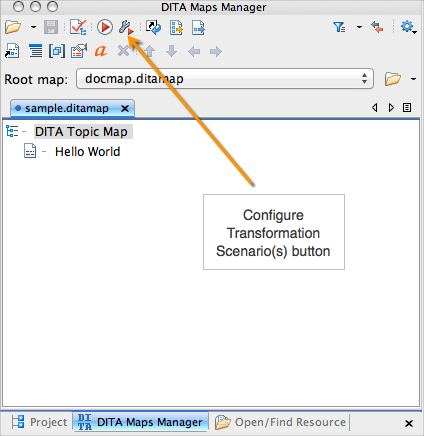
The map will open in a left side pane in the DITA Maps Manager view. This view makes it easy to jump around to various topics in your help system.
In the DITA Maps Manager view, click the wrench icon (Configure Transformation Scenario(s)).
- Select DITA Map Webhelp, and then click Apply
Associated.
On subsequent builds, you can just click the red triangle (Apply Transformation Scenarios) to the left of the Configure Transformation Scenario(s) button. This button will apply whatever selections you have set in the Configure Transformation Scenario(s) dialog.
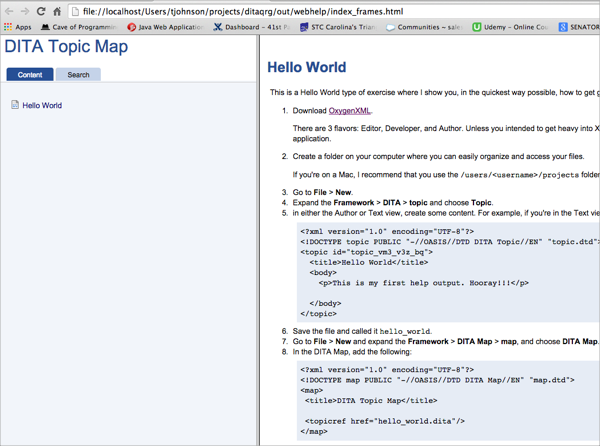
Congratulations. You should see a sample webhelp output as shown below.
About Tom Johnson

I'm an API technical writer based in the Seattle area. On this blog, I write about topics related to technical writing and communication — such as software documentation, API documentation, AI, information architecture, content strategy, writing processes, plain language, tech comm careers, and more. Check out my API documentation course if you're looking for more info about documenting APIs. Or see my posts on AI and AI course section for more on the latest in AI and tech comm.
If you're a technical writer and want to keep on top of the latest trends in the tech comm, be sure to subscribe to email updates below. You can also learn more about me or contact me. Finally, note that the opinions I express on my blog are my own points of view, not that of my employer.