
Version control systems (such as Git)
Almost every IT shop uses some form of version control as they develop software code. Version control is how developers collaborate and manage their work. When you use docs-as-code tools, you’ll probably also use version control such as Git. Because version control is such an essential element to learn, we’ll dive more deeply into it here and in upcoming activities. In many ways, mastering Git is more challenging than learning a particular static site generator such as Jekyll or Hugo.
- Plugging into version control
- Different types of version control systems
- The idea of version control
- Basic workflow with version control
- Branching
- Can you collaborate on doc projects in Git with other writers?
- Activities
Plugging into version control
If you’re working in API documentation, you’ll most likely need to plug into your developer’s version control system to get code. Or you may be creating branches and adding or editing documentation there.
Many developers are extremely familiar with version control, but typically these systems aren’t used much by technical writers because technical writers have traditionally worked with binary file formats, such as Microsoft Word and Adobe Framemaker. Binary file formats are readable only by computers, and version control systems do a poor job in managing binary files because you can’t easily see changes from one version to the next.
If you’re working in a text file format, you can integrate your doc authoring and workflow into a version control system. When you do, a whole new world will open up.
Different types of version control systems
There are different types of version control systems. A centralized version control system requires everyone to check out or synchronize files with a central repository when editing them. This setup isn’t so typical anymore because working with files on a central server tends to be slow.
More commonly, software shops use distributed version control systems. The most common system is Git (probably because GitHub provides Git repositories for free on the web) so we’ll be focusing on it here. Other version control systems include Mercurial, Subversion (SVN), and Perforce. Due to Git’s popularity, we’ll focus on it exclusively here.
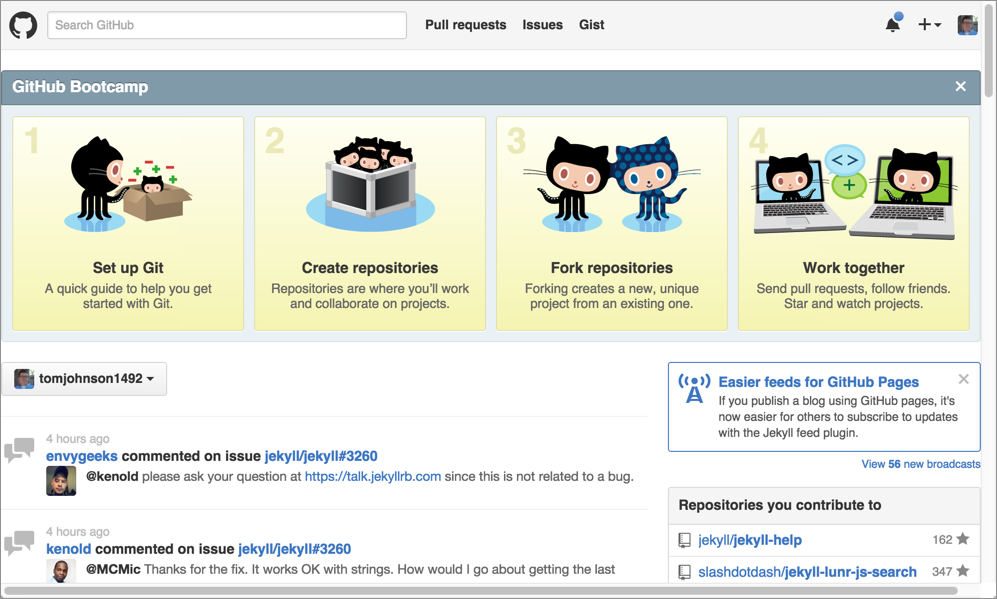
Note that Git is different from GitHub. GitHub provides online repositories and tools for Git. GitHub is a platform for managing Git projects, with a nice GUI for performing some Git tasks such as pull requests.
Bitbucket is Altassian’s version of GitHub. Bitbucket lets you use either Git or Mercurial, but most of the Bitbucket projects use Git. Bitbucket tends to only be used by companies already heavily using Atlassian.
The idea of version control
When you install version control software such as Git and initialize a repository in a folder, an invisible folder gets added to the repository. This invisible folder handles the versioning of the content in that folder. (If you want to move the Git tracking to another folder, you can move the invisible git folder to that other folder.)
When you add files to Git and commit them, Git takes a snapshot of the committed files at that point in time. When you commit another change, Git creates another snapshot. If you decide to revert to an earlier version of the file, you just revert to the particular snapshot. These snapshots are the basic idea behind versioning content.
Basic workflow with version control
There are many excellent tutorials on version control on the web, so I’ll defer to those tutorials for more details (for example, see Peter Gruenbaum’s Git and GitHub for Writers course on Udemy, with coupon code IDRATHER for a discount). In short, Git provides several stages for your files.
Here’s the general workflow:
- You must first add any files that you want Git to track. Just because the files are in the initialized Git repository doesn’t mean that Git is actually tracking and versioning their changes. Only when you officially “add” files to your Git project does Git start tracking changes to that file.
- Any modified files that Git is tracking are said to be in a “staging” area.
- When you “commit” your files, Git creates a snapshot of the file at that point in time. You can always revert to this snapshot.
- After you commit your changes, you can “push” your changes to the master. Once you push your changes to the master, your own working copy and the master branch are back in sync.
Branching
Git’s default repository is the master branch. When collaborating with others on the same project, usually people branch the master, make edits in the branch, and then merge the branch back into the master.
If you’re editing doc annotations in code files, you’ll probably follow this same workflow — making edits in a particular doc branch. When you’re done, you’ll create a pull request to have developers merge the doc branch back into the master.
Can you collaborate on doc projects in Git with other writers?
My discussion with Git here has been introductory and mostly directed as if you’ll be interfacing with developers for all your Git interactions. However, if you’re working in a docs-as-code environment, most likely your entire doc team (e.g., 5-10 writers) might be using a tool such as Jekyll, Hugo, Sphinx, or some other static site generator, and you’ll be collaborating in the same repo on docs using Git.
Collaborating on docs in Git can be a lot more challenging than it initially seems, especially if you’re working on the same files. Exactly how much you use Git when collaborating with docs, and in which scenarios tends to be somewhat fuzzy. For example, I recently received a question from a former colleague that hints at some of the challenges in collaborating with Git. My colleague writes,
Hi Tom, do you have a recommended article for how a team of writers collaborate in git? We’ve made the big switch to our new docs pipeline and the biggest challenge is that we are unable to collaborate in git. A lot of changes and suggestion to technical documentation is hard to resolve in the git workflow. We are now talking about keeping the doc in Google docs and then porting to git after approval from the team and stakeholders. Does that make sense?
It seems that in their switch to Git, they tried to manage all aspects of content development and collaboration through Git. Note that even if you’re using Git, there is a good reason for initially developing content in some other platform such as Google Docs or Salesforce Quip. If you’re working together in a wiki-like way on the initial version of the content, making edits back and forth while the content is in a high degree of flux, then yes you need a more fluid and flexible platform that won’t involve playing tennis with Git with various commits and merges. I consider this wiki stage more of a sandbox platform for early content development, when you’re making radical edits in a highly collaborative way. If you try to do this purely in Git, you’ll find it stiff and awkward.
When working with developers on content, the developers often prefer to draft it on a wiki (“wiki” tends to be the universal name for any collaborative platform, such as Google Docs, Quip, Workdocs, or any other non-published web page platform, regardless of whether it’s actually a wiki). These platforms are much faster when you want to develop content with comments and replies, and lots of other back and forth. Developers really aren’t accustomed to managing documentation in Git anyway, and will find dumping and editing knowledge on a wiki the most common method.
But as soon as the content is finalized (for a first draft) and ready to be published as a web page with the rest of the documentation, you can migrate it from the wiki into your doc system. At this point in the process, the writer takes full control of the content. When you want to gather input from others to make changes, you might render the page as a PDF and put it into something like Workdocs for easy annotations (comments and replies and replies to comments, etc.).
As the review finishes and the content is merged in with the other sea of documentation topics, you’ll probably make your edits directly in the repo, without always pushing the content out for review. At this point, your doc team will need to decide on the right Git workflow for your team.
Note that there are various workflows that teams might adopt (see 5 types of Git workflow that will help you deliver better code for some examples). Different teams adopt processes that fit their needs, which is what’s great about Git. Git is flexible enough that it can be used in a dozen different ways all to achieve a similar end.
For example, some teams are strong proponents of following a “rebasing” workflow. Rebasing changes the way Git stores the history of commits by (fictionally) representing the commits as if in chronological order (rather than merged in from various timelines). This makes it easy to roll back catastrophes. (I’m not a fan of rebasing, though, as I think it introduces too much complexity and has some problematic scenarios.)
My personal approach is to leave content in the master branch as much as possible. I don’t like branching every time I have an update. If I’m working on a new page, I’ll set the page as unpublished. If I’m adding a new section, I might surround the new section with comment tags until ready to publish it.
Only if I’m developing an extensive edit to existing content do I create a branch for the new content. I store the content in the branch so that I can switch back to master and continue making other updates until I’m ready to go live with the branch content. Otherwise, if I start overhauling a topic (e.g., Topic A) in preparation for an upcoming release two weeks away, but then someone says I need to fix some typos in Topic B immediately, I wouldn’t be able to push Topic B’s edits live without also pushing the unfinished overhaul of Topic A live as well. To accommodate these scenarios, I store the edits to Topic A in a branch.
With most doc teams, we split the work into different stewardships. For example, John owns Project A, Sally owns Project B, and Kim owns Project C. It’s rare that we’re each making updates on content that the other owns. When everyone works on different files, merge conflicts rarely happen. In these scenarios of divided stewardship, it’s fairly easy to collaborate on docs with your team in Git.
But suppose that you are in fact collaborating with others on the same topics. If John and Sally start making edits to the same topics in Project A on their local machines, as soon as they push their local versions to the remote, one of them (the later one) is bound to receive merge conflicts. Merge conflicts are Git’s way of raising a red flag about the merge — you’re asking Git to make contradictory merges. Two writers made conflicting updates to the same lines between commits, and now Git wants you to tell it which changes it should use. You might need to reach out to the other writer to see which updates should be committed.
When merge conflicts happen, Git removes the conflicted files from the staging area and inserts conflict markers (<<<<<<< HEAD and >>>>>>> local commit msg) in the problematic places in the files. In addition to the conflict markers, Atom editor will also highlight these blocks in visibly distinct ways (blue and purple).
If you run git pull and get a merge conflict, the message from Git looks like this:
CONFLICT (content): Merge conflict in somefile.md
Automatic merge failed; fix conflicts and then commit the result.
(If you want to get familiar with merge conflicts and scenarios, it’s easy to simulate merge conflicts. Make edits in the GitHub browser while logged in as one user, and make different edits locally with Git configured as another user. Then push the local to origin and observe the conflicts.)
When you get a merge conflict, the conflicted files are removed from the merge process and taken out of the staging area. To see which files have conflicts, run the following:
git status
At this point you have two options for addressing the merge conflicts.
Option 1: Ask the responsible author to resolve the merge conflicts (recommended)
The first option is to identify the author responsible for the merge conflicts and ask him or her to fix them. Use this method if you didn’t make changes to any of the problematic files and aren’t sure why they are being flagged as having merge conflicts.
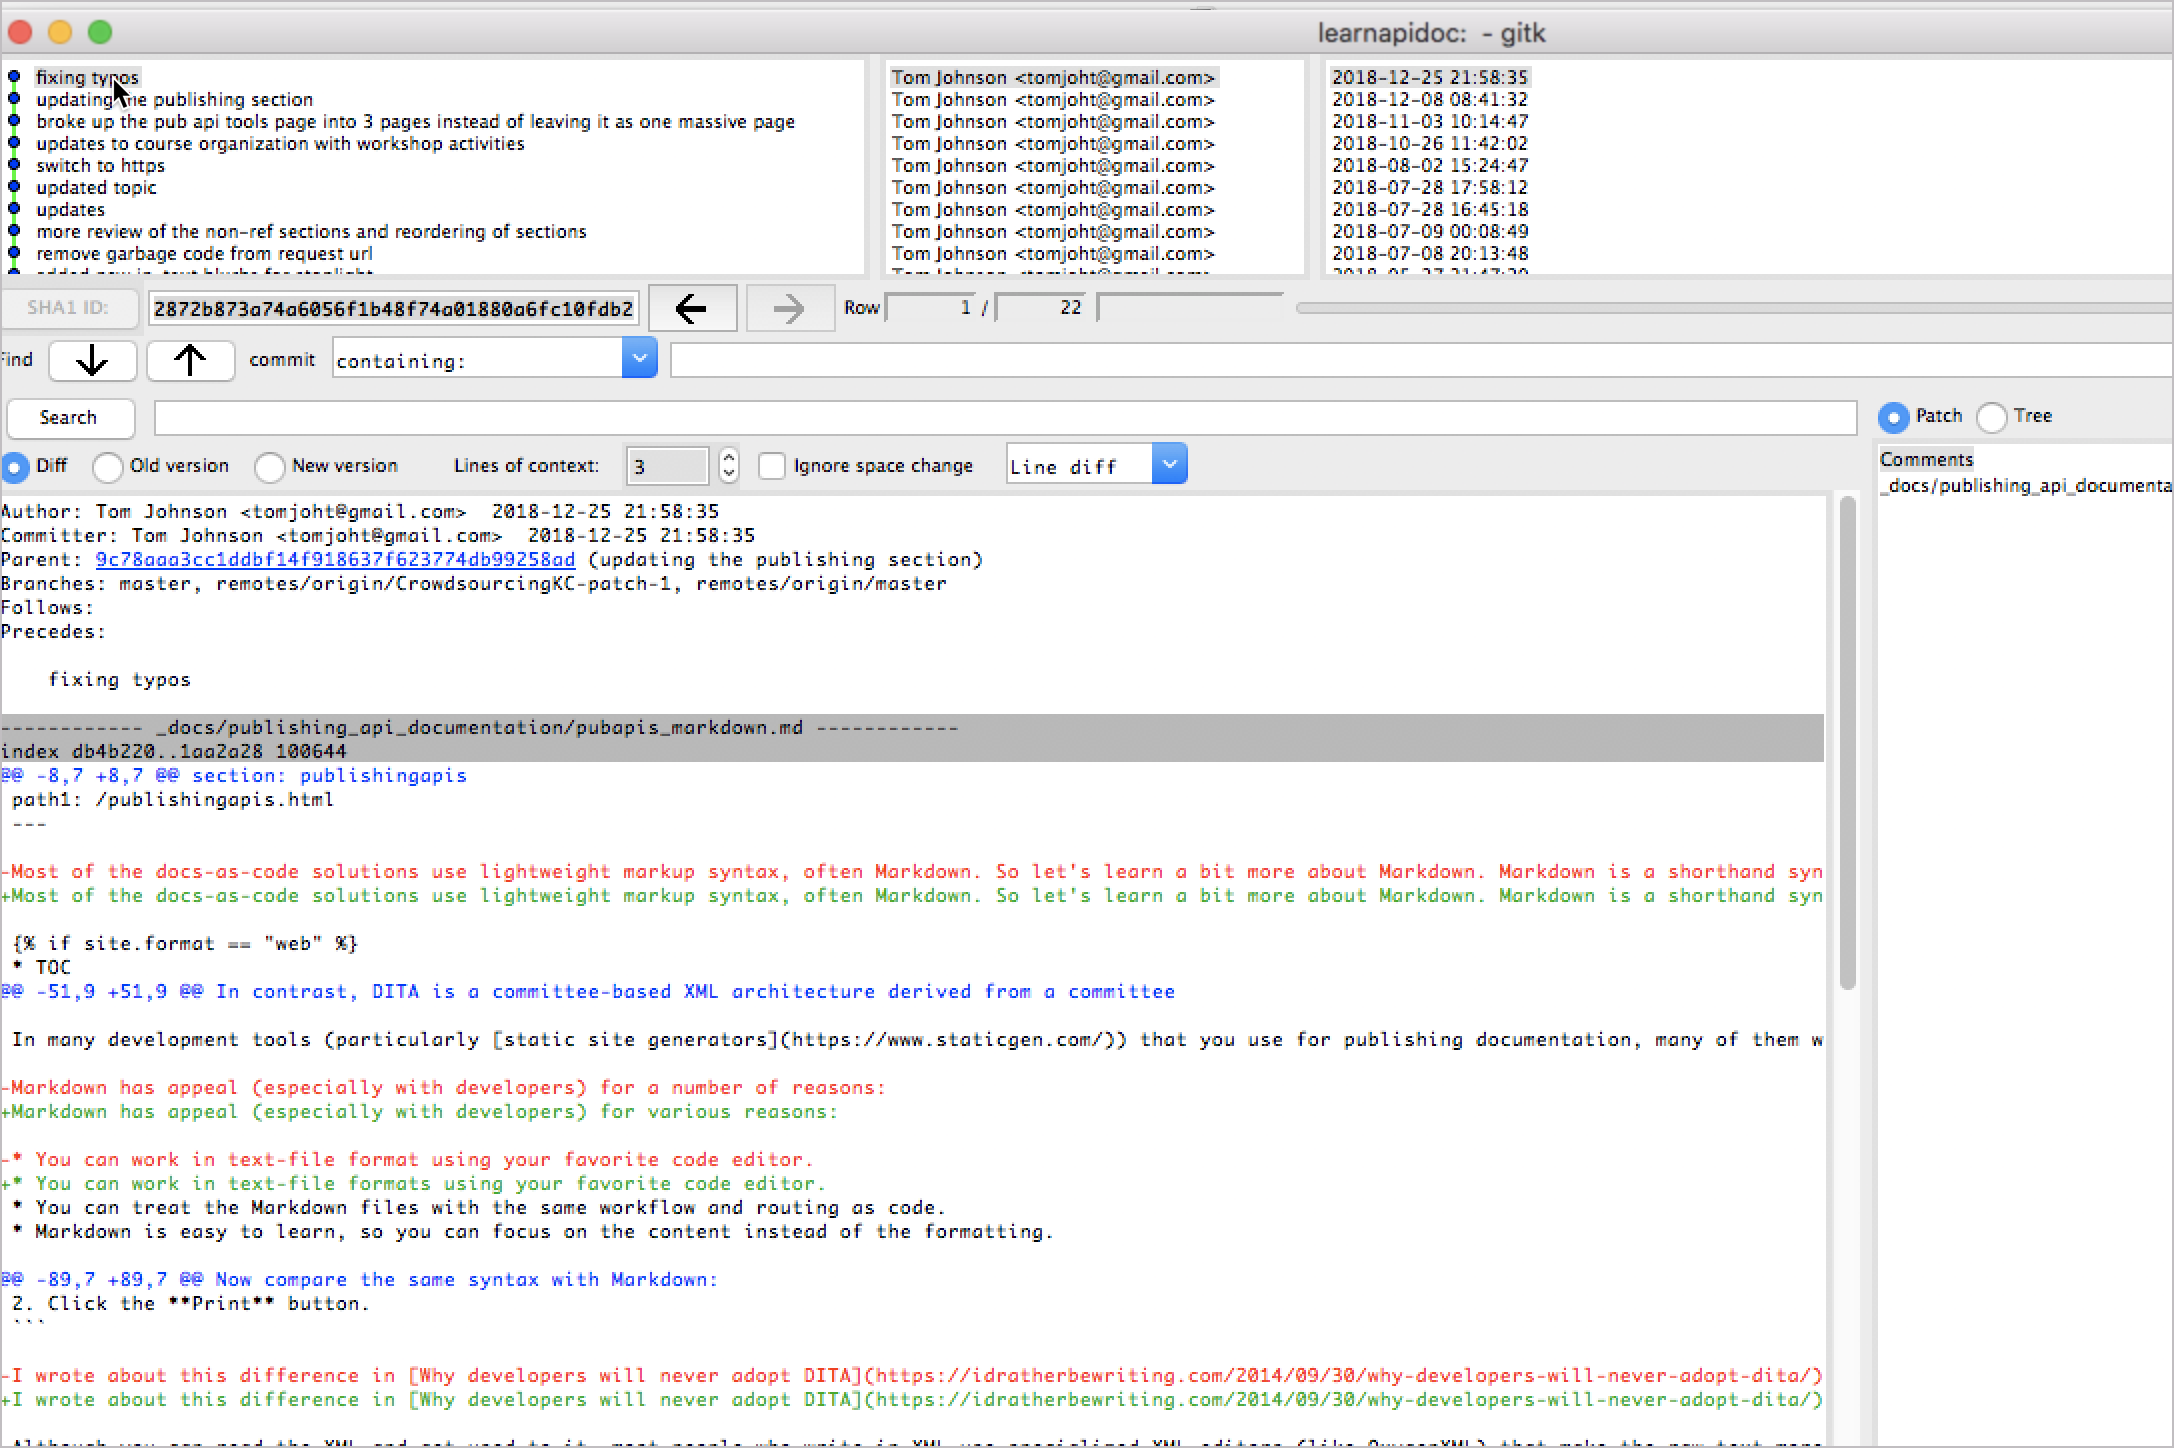
You can look at the change history of the file using a utility called gitk. After you run git status to identify the files with conflicts, right-click one of the files with conflicts in Atom’s side menu and choose Copy Project Path. Then run a command such as this:
gitk some-path/myfile.md
In the gitk window that opens up, look to see who made the most recent changes to the file. Ping the author and ask them to address the conflicts and then push the updates out to the remote. Here’s an example of the gitk window:
While waiting for the author to fix the merge conflict, you can abort your attempted merge with this command:
git merge --abort
This rolls back the merge. After the author fixes the merge conflict, push in your updates.
Option 2: Resolve the merge conflicts yourself
You can also resolve the merge conflict yourself. Choose this method if you’re implicated in the file’s history and might be the one responsible for the conflicts. Open up the conflicted files (cmd + T in Atom) that have the conflict and look for the blue and purple highlighted blocks:
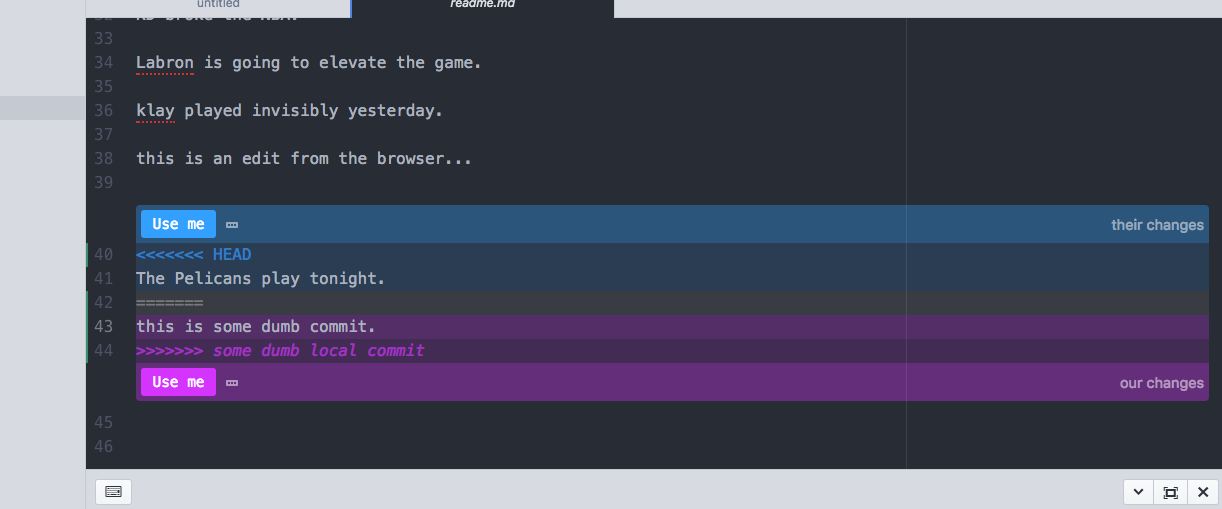
On the right, Atom notes the blue block that is “their changes” and the purple block that is “our changes.” In this case, the text “The Pelicans play tonight” is from a commit that someone else made (it’s the commit made via the GUI). It’s a change we’re pulling into our local version; hence, Atom flags it as “HEAD.” The “HEAD” is the last commit on the branch that is currently checked out. In contrast, the purple “our changes” block is our local commit. It’s the change we made in our commit.
If you own the file’s content, simply select which “Use me” block you want to keep (probably “our changes”). If this isn’t a file you own, choose the “Use me” that relates to “their changes” (the HEAD). You might also reach out to the author to confirm that you’re selecting the right commit. (You can use gitk to easily see commits on the file.)
When merge conflicts occur, Git takes the files out of the staging index and requires you to fix the conflict and re-add the file to the staging area. Then you will need to commit the file:
### add specific files with conflicts that you resolved
git add somefile.html

### or add all files
git add .

### commit the change
git commit -m 'commit the change'

### push your changes
git push
For more information on resolving merge conflicts, see Resolving a merge conflict using the command line.
Also, note that sometimes Git throws merge conflicts for no apparent reason. For example, change a file from title case to lower case, and you might throw Git into a bit of confusion. Other times you might see merge conflicts for reasons no one can figure out — maybe you didn’t make any changes to the files that it’s flagging as having conflicts. In Git scenarios, there are lots of actors making different commands in different environments. It can be hard to track down the reasons for conflicts. Just resolve them and move on.
For more info learning Git overall, see Learning Git. See also this online course on Udemy: Git Learning Journey - Guide to Learn Git (Version Control), created by Anna Skoulikari, who you can also find on Write the Docs Slack.
Activities
With that brief introduction to docs-as-code and version control, let’s move on to two activities that use Git:
About Tom Johnson

I'm an API technical writer based in the Seattle area. On this blog, I write about topics related to technical writing and communication — such as software documentation, API documentation, AI, information architecture, content strategy, writing processes, plain language, tech comm careers, and more. Check out my API documentation course if you're looking for more info about documenting APIs. Or see my posts on AI and AI course section for more on the latest in AI and tech comm.
If you're a technical writer and want to keep on top of the latest trends in the tech comm, be sure to subscribe to email updates below. You can also learn more about me or contact me. Finally, note that the opinions I express on my blog are my own points of view, not that of my employer.
100/165 pages complete. Only 65 more pages to go.