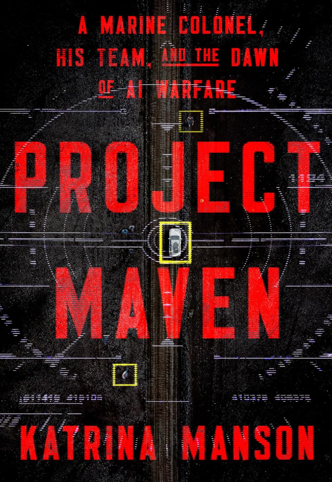


How I turn my API doc course into a PDF and sell it on Buy Me a Coffee
My API documentation course is free to read on the web, but I also sell a PDF version of it through Buy Me a Coffee. The PDF is currently 975 pages, and it comes as a zip file containing a single comprehensive PDF plus a separate PDF for each chapter. In this post, I’ll walk through each step of how I build that PDF and sell it. My setup uses Jekyll, but the general approach should apply to most static site generators. I’ve written it as an instruction manual for anyone who wants to do something similar with a long web asset, such as a course, a book-length series, or a documentation set.
Note: This post is AI-generated. I would never have gotten around to writing such a detailed walkthrough by hand, but AI makes it easy. I’m mainly documenting this process for the benefit of others who are trying to do something similar.
- Why I sell a PDF (and what it earns)
- Using AI to set this up
- Overview of the process
- Requirements
- 1. Organize your content in a single navigation file
- 2. Create a separate print configuration
- 3. Create a print layout without sidebars or navigation
- 4. Hide web-only content
- 5. Write print CSS
- 6. Create front matter pages
- 7. Generate the list of pages for Prince
- 8. Build the PDF with Prince
- 9. Split the PDF into chapters
- 10. Check the output
- 11. Zip the files and upload them
- 12. Set up the product on Buy Me a Coffee
- 13. Link to the product from your site
- Automating the whole thing
- Alternatives to Prince
- Conclusion
Sponsored
Sponsored

Want to level up your API documentation skills? Mark Wentowski is teaching a live API documentation course this fall at docsgeek.io. The fall cohort starts October 19 and includes seven 90-minute classes, Mondays 8:00–9:30am PT, running through November 23. Code TOMAPIS takes $250 off.
Why I sell a PDF (and what it earns)
Why would anyone pay for content that’s already free online? Who wants to read 975 pages in a PDF instead of on a website? I started selling the PDF after I tracked click metrics on my site and saw a lot of demand for a PDF version. People seem to really want the PDF. Readers might want to read offline, print a chapter, or just have the whole course in one file. The chapter PDFs also make it easy to upload the course into Claude or other AI tools, which tend to have file size limits that a 975-page PDF exceeds.
My first sale was on December 29, 2021. Since then, Buy Me a Coffee shows 347 claims of the PDF and $6,683 in all-time sales, with $120 in the last 30 days. That’s spare pocket change, not real sustainable money. Even so, Buy Me a Coffee once sent me an email saying that my sales put me in the top 2% of people making money on the platform, so I suspect not many people make much money selling digital assets this way.
To put that number in perspective, the PDF’s all-time sales over nearly five years are about what you can make in a single day by giving a workshop on the same content. That’s why the PDF was never a priority for me. However, even workshop income is pocket change compared to the real value of the course. The course gives me credibility in API documentation, and that credibility helps with landing API documentation jobs, especially at big tech companies, which is where the real money is. It’s easy to be shortsighted and judge an asset like this by its direct sales. The bigger payoff is the long-term branding and how the asset positions you for career success. In other words, if you’re weighing whether to build a large web asset like a course, don’t count only the PDF sales.
Oddly, I get very little feedback on the PDF. I suspect that lots of people download it but never finish it. That’s likely because I made a mistake in letting the course grow to 975 pages. The course became something like the Winchester Mystery House, in that I just kept adding and adding to it. Even now, so much has changed in API documentation around AI that I could keep expanding the course indefinitely. But at what point do you stop? When does a course become too long for anyone to finish? And would readers be better served by a shorter, more focused version?
Using AI to set this up
I’ll admit that the setup is complex, and doing it all manually would probably be overwhelming. Part of why I’m documenting it in detail is so that you can point your AI tool at this post and have it do the work. For example, you could give Claude Code this post and ask it to set up a similar PDF build for your own site, and then to package the process as a skill that you can run whenever you want to regenerate the PDF. (My own skill is linked in Automating the whole thing.) If you’d rather understand each piece first, the rest of this post explains the steps in detail.
Overview of the process
At a high level, the process has these stages:
- Organize your content in a single navigation file.
- Create a separate print configuration for your site generator.
- Create a print layout that leaves out sidebars, navigation, and other web boilerplate.
- Hide web-only content (such as videos and interactive demos) from the print output.
- Write print CSS for page size, running headers and footers, and links.
- Create front matter pages, including a cover, a copyright page, and a table of contents.
- Generate an ordered list of the pages to include.
- Build the PDF with Prince.
- Split the PDF into chapter files.
- Check the output.
- Zip the files and upload them to a file host.
- Set up the product on Buy Me a Coffee.
- Link to the product from your site.
The first time through, this process takes a while to set up. After that, the whole build runs from a single script in a few minutes.
Requirements
Here’s what you’ll need:
- A static site generator. I use Jekyll, but Hugo, Sphinx, and others can produce the same kind of HTML output. The key requirement is that you can build your site with a different configuration and layout for print.
-
Content organized in a navigation file. My course’s sidebar comes from a YAML file (
_data/docapis.yml) that lists every chapter and page in order. This single file drives the web sidebar, the PDF’s page order, and the PDF’s table of contents. - Prince. Prince converts HTML and CSS into PDF, and it supports the CSS features for paged media, such as running headers, page counters, and generated tables of contents. Note the licensing. The free version of Prince is for non-commercial use, and it adds a notice identifying Prince to the PDFs it generates. If you’re selling the PDF, you’ll need a license. I use a Desktop license, which covers self-publishing on a single computer. As of October 2026, the Desktop license costs USD $495. It’s 100% worth it, trust me.
-
pdftk. This command-line tool splits the comprehensive PDF into chapter PDFs. (On a Mac, install it with
brew install pdftk-java.) - A file host with a stable URL. I host the zip file on Wasabi, an S3-compatible storage service. Wasabi is much cheaper than AWS, and I can upload files with a single command from the terminal using the AWS CLI. I love it. Any storage service that gives you a public URL should work, though.
- A Buy Me a Coffee account. Buy Me a Coffee lets you sell digital products in its Shop alongside donations and memberships. To receive payouts, you connect it to Stripe.
- Optional: Python. I use a short Python script to split the PDF into chapters automatically.
1. Organize your content in a single navigation file
Before you think about PDFs at all, make sure your content’s order is defined in one place. In my course, _data/docapis.yml lists each chapter and its pages. Here’s a simplified excerpt:
folders:
- title: "Chapter 1: Introduction to REST APIs"
  landing: /learnapidoc/docapis_introtoapis.html
  folderitems:
  - title: "Overview"
    jurl: /learnapidoc/docapis_introtoapis.html
    type: web
  - title: "What is a REST API?"
    jurl: /learnapidoc/docapis_what_is_a_rest_api.html
  - title: "Activity: Identify your goals"
    jurl: /learnapidoc/docapis_identify_your_goals.html
Because the sidebar, the PDF’s page list, and the PDF’s table of contents all loop through this same file, they always stay in sync. If you add a page to the sidebar, it automatically appears in the next PDF build. In other words, the navigation file is the backbone of the whole process.
You can also mark some entries as web-only. In my sidebar file, any entry with type: web is skipped in the PDF. For example, each chapter has an “Overview” entry in the web sidebar that points to the chapter’s landing page. The PDF already includes the landing page at the start of each chapter, so the Overview entry is marked type: web to avoid printing the same page twice.
2. Create a separate print configuration
Next, create a configuration file that’s used only for the PDF build. Mine is configs/_config_pdf_all.yml. Jekyll uses it by itself, rather than merging it with the main _config.yml. Here are the settings that matter most:
title: Documenting REST APIs
format: print
sidebar: docapis
baseurl: /Users/tomjohnson/projects/idratherbewriting/_site
api_media: /Users/tomjohnson/projects/idratherbewriting/images/api
cover: true
cover_image: /Users/tomjohnson/projects/idratherbewriting/images/api/ebook_cover.png

defaults:
  - scope:
      path: ""
      type: docs
    values:
      layout: printpdf
      published: true
A few of these settings deserve explanation:
-
format: print. Pages can check this value to show or hide content in the PDF (see step 4). -
baseurl,api_media, andcover_image. These are absolute paths on my computer. Prince reads the built HTML files from disk, not from a web server. On the web, a link like/learnapidoc/docapis_introtoapis.htmlresolves against the website’s domain, but when Prince reads files from disk, the same link would point to a folder at the root of my hard drive. Settingbaseurlto the absolute path of the built site makes links and stylesheets resolve to the right files. The downside is that my build only works when the project lives at that exact path on my computer. (Prince can also read pages from a URL, so an alternative might be to run a local web server and give Princehttp://localhostURLs instead, though I haven’t tried this.) -
defaults. This section applies theprintpdflayout to every page, so I don’t have to change the layout in each file.
My images live in a cloud storage bucket rather than in the repository, so before building, I download a local copy of the course images to the folder that api_media points to. For years, I assumed Prince required local images. However, when I tested it, Prince loaded an image from my storage bucket’s URL without any trouble, so local images aren’t a requirement. Local copies are probably still faster and more reliable for a build with about 1,000 images, and they let you build without an internet connection.
3. Create a print layout without sidebars or navigation
On the web, each page includes a sidebar, a top navigation bar, a footer, ads, and other elements. You don’t want any of that in a PDF. You could hide all of it with print CSS, but I find it simpler to use a separate layout that never includes these elements in the first place. My printpdf layout contains just the stylesheets, the page title, and the page content:
<head>
  <meta charset="utf-8">
  <title>{{ site.title }}</title>
  <link rel="stylesheet" href="{{site.baseurl}}/assets/css/pdf/syntax.css" />
  <link rel="stylesheet" href="{{site.baseurl}}/assets/css/pdf/bootstrap.min.css" />
  <link rel="stylesheet" href="{{site.baseurl}}/assets/css/pdf/theme-blue.css" />
  <link rel="stylesheet" href="{{site.baseurl}}/assets/css/pdf/printstyles.css" />
  <script>
    Prince.addScriptFunc("datestamp", function() {
      return "Last generated: {{ site.time | date: '%b %d, %Y' }}";
    });
  </script>
</head>
<body class="{{page.class}}">
  <h1 class="post-title-main" id="{{page.permalink | replace: '/', '' }}">{{ page.title }}</h1>
  <div class="post-content">
    {{ content }}
  </div>
</body>
Two details in this layout matter later. First, the id on the h1 gives each page a link target, which the table of contents uses to look up page numbers. Second, the datestamp script function lets the PDF’s header show the date the PDF was generated (see step 5). CSS can’t access the build date on its own, so this small JavaScript function supplies it. Jekyll inserts the build date into the script when it builds the site, and Prince runs the script when it generates the PDF. As a result, the “Last generated” date updates automatically each time I regenerate the PDF. (A second function, guideName, supplies the course title for the footer in the same way.) Everything else in the headers and footers, such as the page numbers and the current page title, comes from CSS alone.
4. Hide web-only content
Some content works on the web but not on paper, such as embedded YouTube videos, JavaScript demos, interactive API explorers, and Google Trends widgets. Because the print configuration sets format: print, you can wrap this content in a conditional:
{% if site.format == "web" %}
<iframe src="https://www.youtube.com/embed/..."></iframe>
{% endif %}

{% if site.format == "print" %}
*Note: This content contains a video. Go to [the web version of this page](https://...) to view it.*
{% endif %}
You can also go the other way and create print-only versions of content. For example, the course overview page has a grid of clickable chapter tiles on the web. In the PDF, those tiles rendered as a jumble of text and URLs, so I added a print branch that renders a plain bulleted list of chapters instead.
It’s worth searching your content for anything interactive before your first build. Otherwise, you’ll find these problems one page at a time as you read through the PDF.
5. Write print CSS
Prince supports the CSS standards for paged media, which means you can control page size, margins, headers, footers, and page numbers with CSS. Most of my print-specific styling is in printstyles.css. The following sections describe the main pieces. (For details, see the Prince documentation on paged media.)
Page margins and running headers and footers
The @page rule defines the page margins and the content of the header and footer areas. In my PDF, each page shows the current page title at the top left, the generation date at the top right, the course title at the bottom left, and the page number at the bottom right:
h1 { string-set: doctitle content() }

@page {
  margin: 60pt 90pt 60pt 90pt;
  @top-left {
    content: string(doctitle);
    font-size: 11px;
    font-style: italic;
  }
  @top-right {
    content: prince-script(datestamp);
    font-size: 11px;
  }
  @bottom-left {
    content: prince-script(guideName);
    font-size: 11px;
  }
  @bottom-right {
    content: "Page " counter(page);
    font-size: 11px;
  }
}
The string-set property copies the text of each h1 into a named string (doctitle), and the header displays that string. As a result, the header always shows the title of the page you’re reading. The prince-script() values call the JavaScript functions defined in the layout.
Different page styles for different sections
You can define named pages for different sections of the PDF. For example, I don’t want headers or footers on the cover, and I want roman numerals for page numbers in the front matter:
body.title { page: title }
@page title {
  @top-left { content: " "; }
  @top-right { content: " "; }
  @bottom-left { content: " "; }
  @bottom-right { content: " "; }
}

body.frontmatter { page: frontmatter }
@page frontmatter {
  @bottom-right { content: counter(page, lower-roman); }
}
The layout puts each page’s class value on the body tag, so a front matter page with class: frontmatter in its frontmatter automatically gets the front matter page style.
Links
On paper, a link is useless unless the reader can see where it goes. My stylesheet prints each link’s URL in parentheses after the link text:
a::after {
  content: " (" attr(href) ") ";
}
a[href].noCrossRef::after {
  content: "";
}
For links where the URL would just be clutter, I add a noCrossRef class to turn it off. An alternative is to print page numbers for internal links instead of URLs, using target-counter(attr(href), page). I use this technique for the table of contents (see the next step).
Other print styling
The rest of my print CSS is fairly ordinary. It sets a smaller font size, gives tables borders and shaded rows, and gives code blocks a light gray background. I also include a print copy of Bootstrap and the syntax highlighting stylesheet so that the content looks roughly like it does on the web.
6. Create front matter pages
Before the course content, my PDF has three pages of front matter:
- Title page. This page displays a cover image. If you don’t have a cover image, the template can print the title and subtitle as text instead.
- Copyright page. A short copyright notice and contact information.
- Table of contents. A generated list of every chapter and page, with page numbers.
The table of contents is the most interesting of these. Its template loops through the same navigation file as the sidebar and outputs a link to each page:
<div id="navig">
<ul>
{% for folder in site.data[site.sidebar].folders %}
  {% unless folder.type == "web" %}
  <li class="sectionHead"><a href="{{ folder.landing | prepend: site.baseurl }}">{{ folder.title }}</a>
    <ul>
    {% for folderitem in folder.folderitems %}
      {% unless folderitem.type == "web" %}
      <li><a href="{{ folderitem.jurl | prepend: site.baseurl }}">{{ folderitem.title }}</a></li>
      {% endunless %}
    {% endfor %}
    </ul>
  </li>
  {% endunless %}
{% endfor %}
</ul>
</div>
Then the print CSS turns each of these links into a table of contents entry with dot leaders and a page number:
#navig a[href]::after {
  content: leader(".") target-counter(attr(href), page);
}
The target-counter() function looks up the page number where the link target ends up in the final PDF, and leader(".") fills the space between the title and the page number with dots. I love this technique, because Prince calculates all the page numbers for you. You never have to update the table of contents by hand. As a bonus, if a link points to a page that isn’t in the PDF (for example, because the page is missing from the page list or the link is broken), Prince prints the page number as 0. This makes broken links easy to spot. Each chapter’s landing page uses the same technique to list the pages in that chapter.
Prince also creates PDF bookmarks from the headings, so readers get a clickable outline in the sidebar of their PDF reader. These bookmarks become important in step 9.
7. Generate the list of pages for Prince
Prince needs to know which HTML files to combine and in what order. You can pass it a text file with one file path per line. I generate this file with Jekyll, using a template (prince-list-all.txt) that loops through the navigation file:
---
layout: null
---
{{site.baseurl}}/pdf_title_page.html
{{site.baseurl}}/pdf_copyright_page.html
{{site.baseurl}}/pdf_toc_page_all.html
{% for folder in site.data[site.sidebar].folders %}
{% unless folder.type == "web" %}
{{ folder.landing | prepend: site.baseurl }}
{% for folderitem in folder.folderitems %}
{% unless folderitem.type == "web" %}
{{ folderitem.jurl | prepend: site.baseurl }}
{% endunless %}
{% endfor %}
{% endunless %}
{% endfor %}
When Jekyll builds the site, it writes _site/prince-list-all.txt with the absolute path of every page, starting with the front matter. If a page is ever missing from the PDF, this file is the first place to look.
8. Build the PDF with Prince
With all of this in place, building the PDF takes two commands. First, build the site with the print configuration:
bundle exec jekyll build --config configs/_config_pdf_all.yml
Then run Prince on the page list:
prince --javascript --input-list=_site/prince-list-all.txt --no-warn-css-unsupported -o pdf/docapis_all_chapters.pdf
Here’s what each option does:
-
--javascriptruns the script functions that fill in the header and footer. -
--input-listpoints to the list of pages from step 7. Prince starts each file on a new page. -
--no-warn-css-unsupportedsuppresses warnings about CSS properties that Prince doesn’t support. Bootstrap has many of these, and they don’t affect the output. -
-osets the output file.
For my course, Prince takes about a minute and a half to produce the 975-page PDF.
9. Split the PDF into chapters
A 975-page PDF is great for searching the entire course, and all the cross-references work because every page is included. However, it’s unwieldy for reading or printing one chapter. So I also split the comprehensive PDF into a separate PDF for each chapter, using pdftk:
pdftk pdf/docapis_all_chapters.pdf cat 34-71 output pdf/chapter1_introduction_to_rest_apis.pdf
The hard part is knowing the page ranges. For years, my process was to build the PDF, look up where each chapter started in the table of contents, update the page ranges in my build script, and then build everything again. Every content change shifted the page numbers, so I had to repeat this each time.
Now, a short Python script (pdf_split_chapters.py) reads the page numbers from the PDF’s bookmarks instead. Every chapter’s landing page has a title that starts with “Chapter N:”, and Prince creates a bookmark for each one. The script runs pdftk dump_data to get the bookmarks, finds the page where each chapter starts, and splits the PDF so that each chapter ends one page before the next one begins. As a result, the page ranges are always correct, and I only need to build once.
Here’s the core of the script:
data = subprocess.run(["pdftk", pdf, "dump_data_utf8"],
                      capture_output=True, text=True, check=True).stdout
total = int(re.search(r"NumberOfPages: (\d+)", data).group(1))
bookmarks = re.findall(
    r"BookmarkBegin\nBookmarkTitle: (.*)\nBookmarkLevel: (\d+)\nBookmarkPageNumber: (\d+)", data)

# Find the page where each "Chapter N:" bookmark starts
starts = {}
for title, level, page in bookmarks:
    match = re.match(r"Chapter (\d+):", title)
    if level == "1" and match:
        starts.setdefault(int(match.group(1)), int(page))

# Each chapter ends one page before the next one starts
chapters = sorted(starts)
for i, n in enumerate(chapters):
    first = starts[n]
    last = starts[chapters[i + 1]] - 1 if i + 1 < len(chapters) else total
    subprocess.run(["pdftk", pdf, "cat", f"{first}-{last}",
                    "output", f"pdf/chapter{n}.pdf"], check=True)
(The full script also gives each file a descriptive name, splits out the course overview and front matter pages that come before Chapter 1, and stops with an error if any chapter is missing or out of order.) If your PDF has a different structure, the same idea works with whatever heading pattern marks the start of each section.
One caveat with this approach is that only the chapter landing pages can have titles that start with “Chapter N:”. At one point, my glossary page was accidentally titled “Chapter 17: Glossary” even though it belonged to chapter 16, which threw off the split. The script now checks that the chapter start pages are in order and stops with an error if they aren’t.
10. Check the output
Before you publish anything, look at the PDF. Here’s what I check:
-
Prince’s warnings. A warning that says Prince can’t open a stylesheet or image is a real problem. When I rebuilt the PDF in October 2026 after a long break, my print stylesheets had gone missing (a
.gitignorerule had kept them out of version control, so they didn’t survive a fresh clone of the repository). Prince still produced a PDF, but it was completely unstyled. - The page count. Compare it to the previous build. My unstyled PDF was about 1,250 pages instead of about 970, which was an easy signal that something was wrong.
- A few sample pages. I look at the cover, a front matter page, a chapter landing page, and a page with code samples. I check that the headers and footers show the right content, that the table of contents has page numbers, and that code blocks are formatted correctly. In the table of contents, any entry with a page number of 0 means the link’s target isn’t in the PDF, which usually points to a missing page or a broken link.
- Web-only content. Look for interactive widgets or embeds that slipped through. In my case, the chapter tiles on the course overview page were the main offender.
11. Zip the files and upload them
I zip the comprehensive PDF, the front matter, the chapter PDFs, and a short readme file into a single zip file. The readme explains the difference between the comprehensive PDF and the chapter PDFs.
Then I upload the zip file to Wasabi with the AWS CLI. (Because Wasabi is S3-compatible, the regular AWS CLI works, as long as you pass Wasabi’s endpoint.)
aws s3 cp pdf/your-file-name.zip s3://your-bucket-name \
    --profile wasabi \
    --endpoint-url=https://s3.us-west-1.wasabisys.com
The most important decision here is to keep the same file name and URL with every update. My Buy Me a Coffee product links to the zip file’s URL, so if I uploaded each new version under a new name, I’d have to update the product every time. Instead, I overwrite the same file, so buyers always get the latest version from the same link. (I had to allow overwrites in my storage bucket’s settings for this to work.) Before each upload, I copy the previous zip file to a backup with a date in its name, in case I ever need to roll back.
12. Set up the product on Buy Me a Coffee
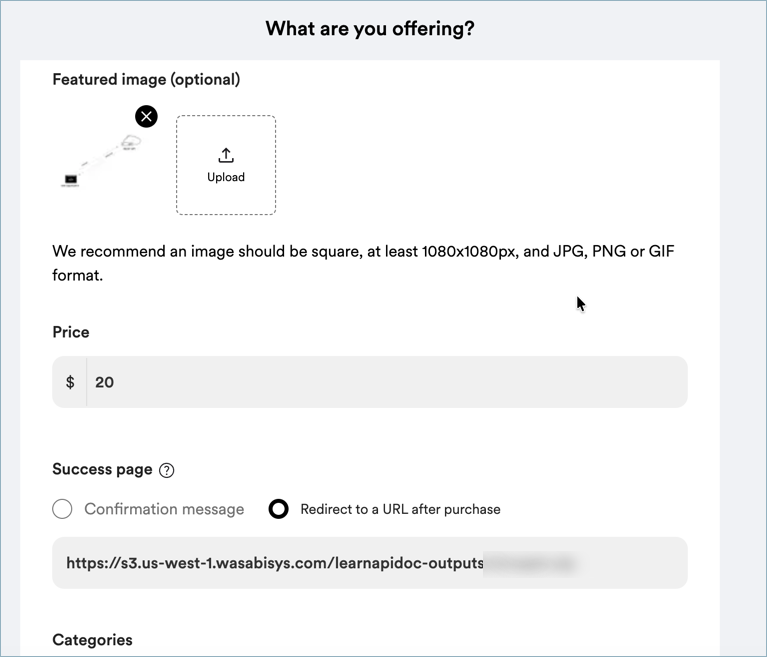
On Buy Me a Coffee, you sell digital products through the Shop section, which has tabs for Products, Orders, Discounts, and Settings. To sell the PDF, I created a product with the following details:
- Name. The title of the product, such as “Documenting APIs: A guide for technical writers and engineers writing API documentation.”
- Description. A summary of what’s included in the download.
- Featured image. A product image. (Buy Me a Coffee recommends a square image, at least 1080x1080 pixels, in JPG, PNG, or GIF format.) I use the cover of the PDF.
- Price. I charge $20.
- Success page. This setting controls what buyers see after they pay. Instead of Confirmation message, I select Redirect to a URL after purchase and enter the public URL of the zip file in my Wasabi bucket. After buyers pay, their browser goes straight to the zip file and downloads it.
The description lists everything included in the download. Mine says the zip file contains the whole course as a single 900+ page PDF and as separate chapter PDFs, followed by the list of chapters. I avoid putting a specific page count or date in the description, because both change with each build, and the PDF itself shows the date it was generated.
For payouts, I link Buy Me a Coffee to Stripe, which deposits the money in my bank account. The whole process is pretty seamless. Buy Me a Coffee takes a cut of each sale (about 5%, as far as I can tell), and Stripe charges its own processing fee on top of that.
13. Link to the product from your site
Finally, make the product easy to find. Every page of my course has a Download PDF link at the top that goes to the Buy Me a Coffee product page. (You can also see all my products on my Buy Me a Coffee shop page.) I also have a Download PDFs page in the course, with a thumbnail of the cover and a link to the product. The page notes that I regenerate the PDF periodically, so it might not include the most recent updates to the web version. I also created a short link to the download file with Rebrandly, so I can find the file quickly when I need to.
Automating the whole thing
All of the build steps (building the site, running Prince, splitting the chapters, and zipping the files) run from a single shell script, along with a Python script for the chapter splitting, and a second shell script handles the upload. I also converted the whole process into an agent skill that walks an AI agent through every step, including the checks in step 10. Now I just ask Claude to run the skill, and it builds the PDF, checks it, backs up the old zip file, and uploads the new one. It’s so easy now. Previously, the process was very tedious, and I always forgot what I needed to do.
The automation matters more than you might think. Before October 2026, I hadn’t updated the PDF since July 2025, and when I came back to it, several parts of my setup had broken in the meantime, including the missing stylesheets and an upload script that pointed to the wrong storage endpoint. Writing the process down as a script and a skill means the knowledge lives somewhere other than my memory.
If you want to set up something similar, you don’t need to copy my files by hand. Point your AI tool at this post (and at my skill and scripts, if you want more detail), and ask it to adapt the process to your own site, site generator, file host, and storefront. Then ask it to write a skill for your version of the process, so that regenerating your PDF becomes a one-line request.
Alternatives to Prince
Prince costs a lot initially, but it has totally been worth it for me. Before Prince, I tried Pandoc and wkhtmltopdf. Both had limited PDF styling, and it was very difficult to figure out the styling, page numbering, headers, and other details I wanted. None of the other solutions I tried handled page numbering the way Prince does.
Still, the license might be more than you want to spend, especially if you’re just testing the idea. Here are a few alternatives worth looking at:
- Your browser’s print function. For short content, printing a page to PDF from your browser might be enough. However, you won’t get running headers, generated tables of contents, or much control over page breaks.
- Paged.js. A free, open-source JavaScript library that implements many of the same paged media CSS features in the browser.
- WeasyPrint. A free, open-source tool that converts HTML and CSS to PDF. It supports many paged media features, though not all of the ones Prince does.
- Pandoc. If your content is in Markdown, Pandoc can convert it to PDF (usually through LaTeX) or to other formats such as EPUB. As I mentioned, I found its PDF styling too limited for what I wanted, but it might work for simpler layouts.
I haven’t used Paged.js or WeasyPrint for my course, so I can’t say how well they’d handle 975 pages and a generated table of contents. (I’d skip wkhtmltopdf, which is no longer maintained. Its GitHub repository has been archived.)
Conclusion
If you have a long web asset that people already read and value, a PDF version can bring in some pocket change and give readers who prefer offline formats (or AI tools) another way to use the content. The setup takes some effort, mostly in the print layout, the CSS, and the table of contents. After that, regenerating the PDF should take a few minutes, as long as you script the build and keep the file’s URL stable. If you want to try this yourself, start with the requirements list above, get a single chapter printing cleanly, and then expand to the full set of pages. Or just hand this post to your AI tool and let it do the setup.
About Tom Johnson

I'm an API technical writer based in the Seattle area. On this blog, I write about topics related to technical writing and communication — such as software documentation, API documentation, AI, information architecture, content strategy, writing processes, plain language, tech comm careers, and more. Check out my API documentation course if you're looking for more info about documenting APIs. Or see my posts on AI and AI course section for more on the latest in AI and tech comm.
If you're a technical writer and want to keep on top of the latest trends in the tech comm, be sure to subscribe to email updates below. You can also learn more about me or contact me. Finally, note that the opinions I express on my blog are my own points of view, not that of my employer.