

Jekyll and CloudCannon continuous deployment
Static site generators are a breed of website compilers that package up a group of files (usually written in Markdown) and make them into a fully deployable website. One of the most popular static site generators (based on the number of downloads, usage, and community) is Jekyll, and it’s the one I have the most experience with, so I’ll be focusing on Jekyll here, particularly how you can integrate Jekyll with CloudCannon for a continuous delivery publishing solution.
- About Jekyll
- Developing content in Jekyll
- Automating builds from Github
- Set up your doc theme on Github
- Make an update to your Github repo
- The Jekyll Aviator theme
About Jekyll
Jekyll is a Ruby-based static site generator, meaning it uses Ruby as the underlying programming language to compile the website. This site and my blog use Jekyll, and I used Jekyll for the documentation at my past two jobs. For example, all the docs here use Jekyll. With Jekyll, you can publish a fully functional tech comm website that includes content re-use, conditional filtering, variables, PDF output, and everything else you might need as a technical writer.
Here’s a documentation theme that I developed for Jekyll:
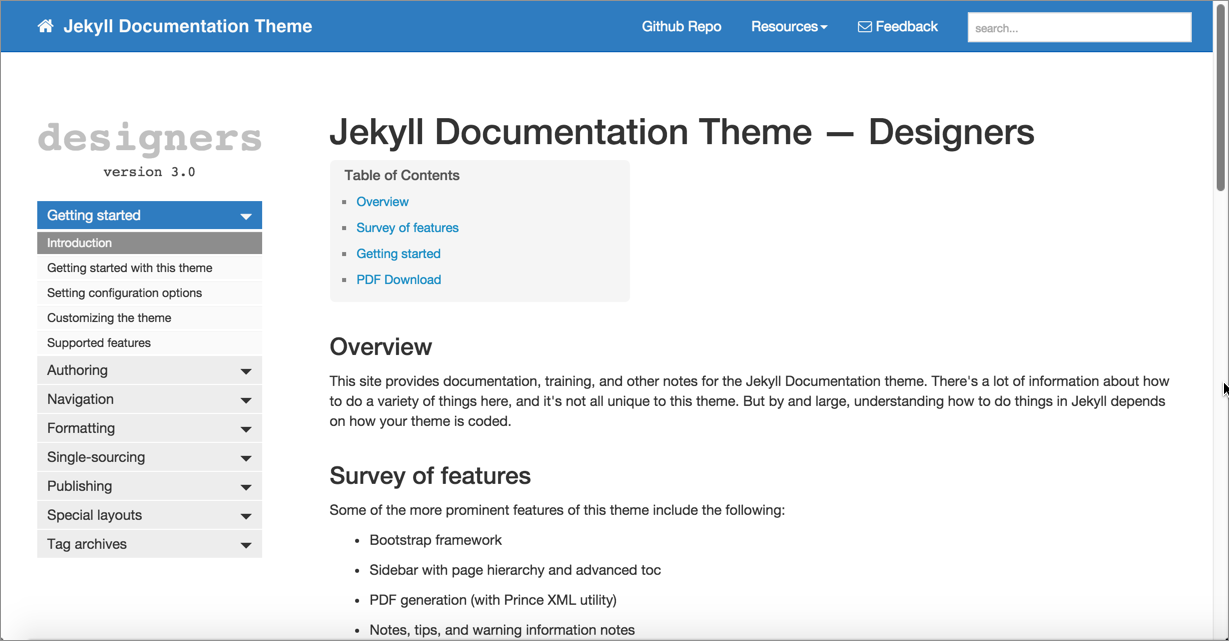
There isn’t any kind of special API reference endpoint formatting here, but the platform is so flexible, you can do anything with it as long as you know HTML, CSS, and JavaScript (the fundamental language of the web). With a static site generator, you have a tool for building a full-fledged website using pretty much any style or JavaScript framework you want. With the Jekyll website, you can include complex navigation, content re-use, variables, and more.
Static site generators give you a lot of flexibility. They’re a good choice if you need a lot of control and customization with your site. You’re not locked into rigid templates or styles. You define your own templates and structure things however you want. For example, with static site generators, you can do the following:
- Write in a text editor working with Markdown
- Create custom templates for documentation
- Use a revision control repository workflow
- Customize the look and feel of the output
- Insert JavaScript and other code directly on the page
Developing content in Jekyll
One of the questions people ask about authoring content with static site generators is how you see the output and formatting given that you’re working strictly in text. For example, how do you see images, links, lists, or other formatting if you’re authoring in text?
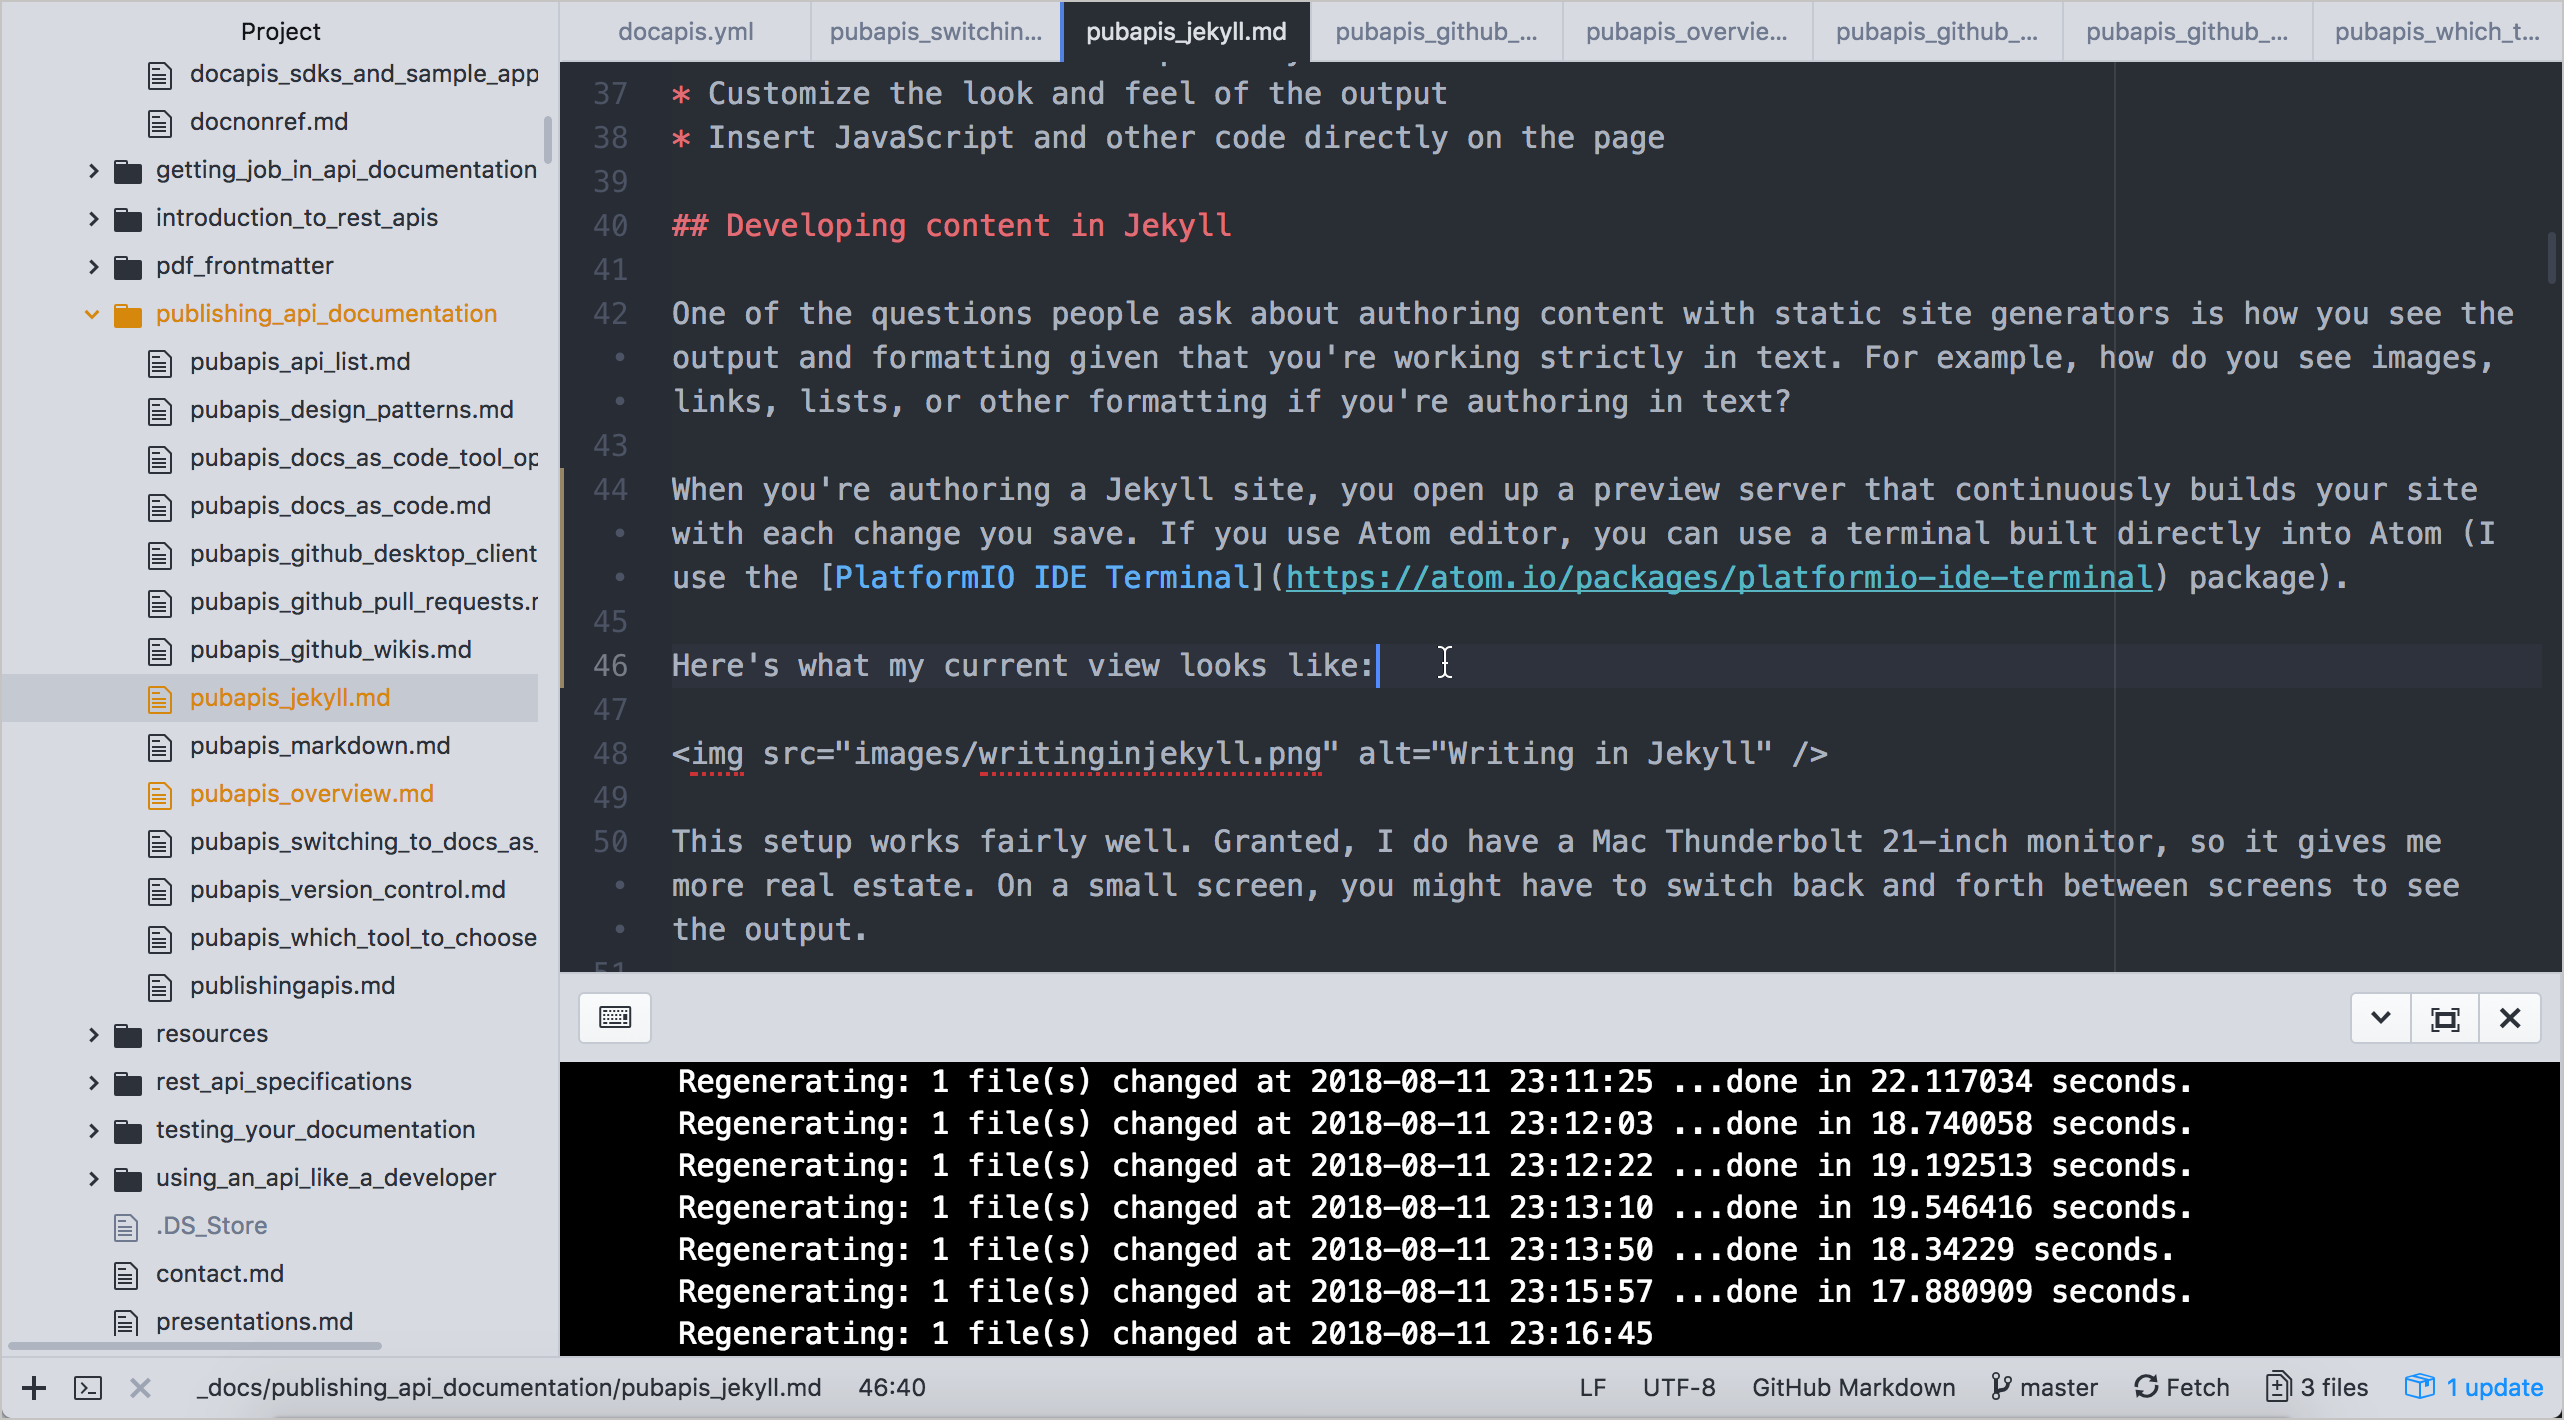
Here’s what the current view of my Jekyll project in Atom editor looks like:
When you’re authoring a Jekyll site, you first generate a local preview by running this command:
bundle exec jekyll serve
The response looks something like this:
~/projects/learnapidoc [master] $ bundle exec jekyll serve
Configuration file: /Users/tomjohnson/projects/learnapidoc/_config.yml
            Source: /Users/tomjohnson/projects/learnapidoc
       Destination: _site
 Incremental build: disabled. Enable with --incremental
      Generating...
                    done in 6.457 seconds.
 Auto-regeneration: enabled for '/Users/tomjohnson/projects/learnapidoc'
    Server address: http://127.0.0.1:4000/learnapidoc/
  Server running... press ctrl-c to stop.
If you use Atom editor, you can use a terminal built directly into Atom (I use the PlatformIO IDE Terminal package).
You then copy the preview server address (in this case, http://127.0.0.1:4000/learnapidoc/) and paste it into your browser. This preview server continuously builds your site with each file change you save. I usually view this browser preview side by side with my Atom editor to make sure the formatting and images look right:
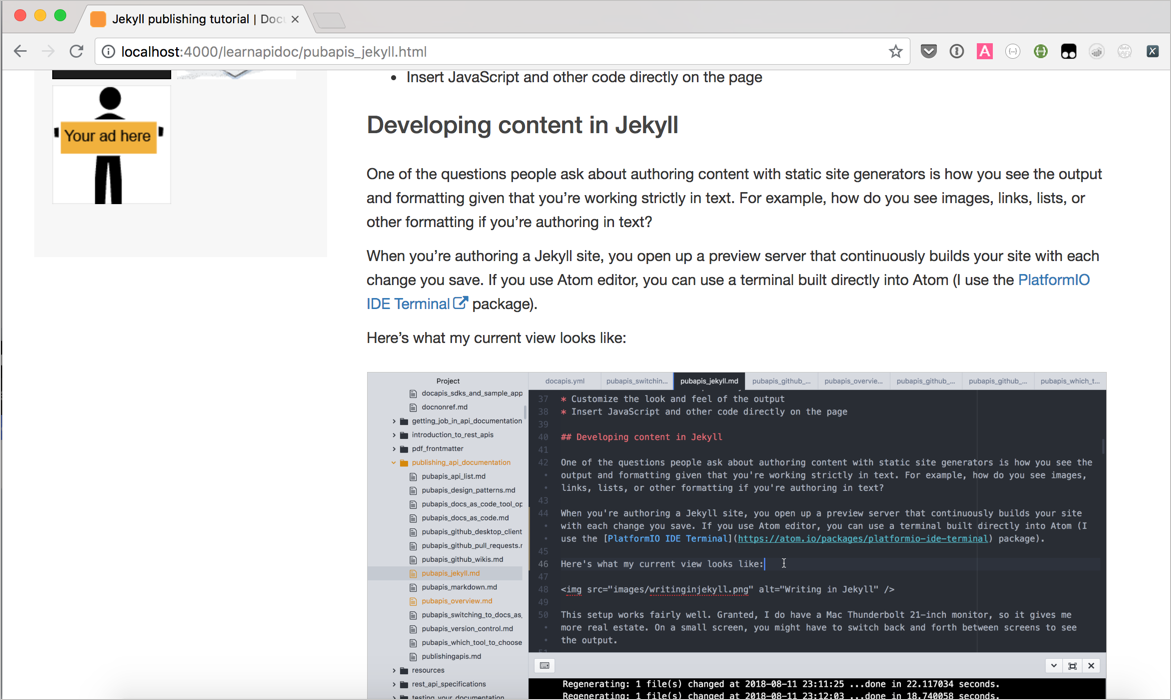
This setup works reasonably well. Granted, I do have a large monitor, so it gives me more real estate. On a small screen, you might have to switch back and forth between screens to see the output.
Admittedly, the Markdown format is easy to use but also susceptible to error, especially if you have complicated list formatting. But the majority of the time, writing in Markdown is a joy. You can focus on the content without getting wrapped up in tags. If you do need complex tags, anything you can write in HTML or JavaScript you can include on your page.
Automating builds from Github
You can integrate Jekyll into platforms such as GitHub Pages or CloudCannon to create continuous delivery publishing. Continuous delivery means that when you commit a change to your Git repo, the server automatically rebuilds your Jekyll site.
GitHub Pages is free and is what I use for my blog and this API docs site. But CloudCannon provides more features that might be needed by the enterprise. So let’s follow an example in publishing in CloudCannon, which describes itself as the “The Cloud CMS for Jekyll.”
In this activity, we’ll publish to CloudCanon using the Documentation Theme for Jekyll (the theme I built). You don’t need to have a Windows machine to facilitate the building and publishing — you’ll do that via CloudCannon and Github. (Of course, being able to build locally is important if you’re developing with Jekyll, but I want to avoid Jekyll installation issues here and just demonstrate the continuous deployment features that a host like CloudCannon provides.) This tutorial will show you how to plug into a robust hosting platform that reads content stored and managed on GitHub.
Set up your doc theme on Github
-
Go to the Github page for the Documentation theme for Jekyll and click Fork in the upper-right corner.
When you fork a project, a copy of the project (using the same name) gets added to your own Github repository. You’ll see the project at
https://github.com/{your github username}/documentation-theme-jekyll.Sometimes people fork repositories to make changes and then propose pull requests of the fork to the original repo. Other times people fork repositories to create a starting point for a splinter project from the original. Github is all about social coding — one person’s ending point is another person’s starting point, and multiple projects can be merged into each other. You can learn more about forking here.
- Sign up for a free account at CloudCannon; sign in using your GitHub credentials.
- Once you sign in, click Create Site and then give the new site a name. Then press Enter to create the site.
-
Click the GitHub Repository box.
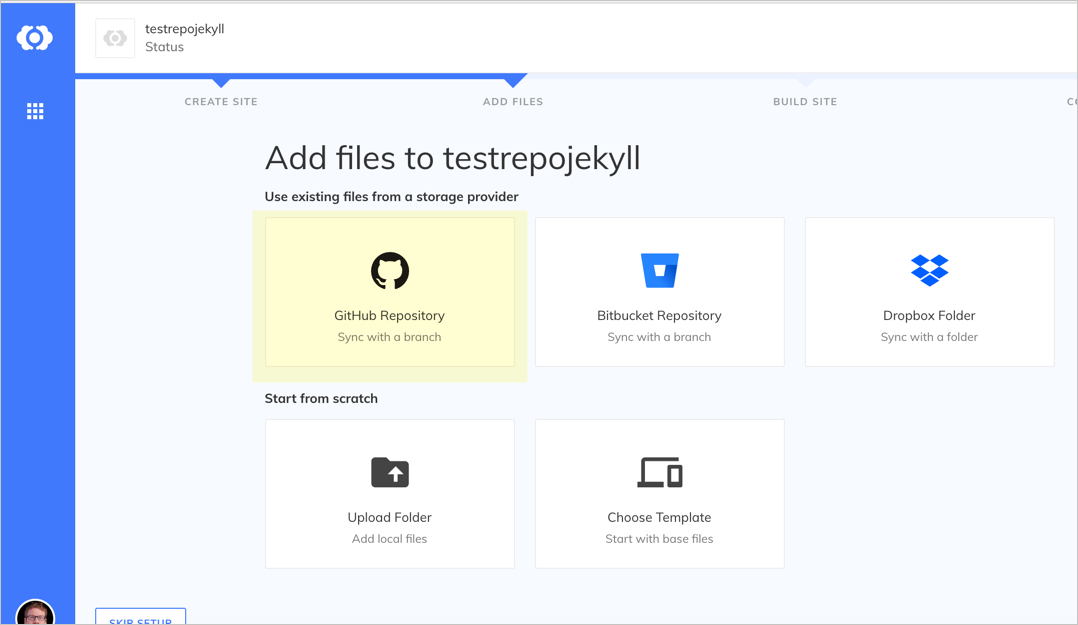
Sync with GitHub -
Choose the GitHub repo that you forked — documentation-theme-jekyll. Select the gh-pages branch.
-
CloudCannon pulls the files from the synced repo over to CloudCannon. When the sync finishes, click Start Site Build to have CloudCannon build Jekyll from the server.
When it finishes building, you see a green check mark in the upper-right corner.
- Go to the Dashboard.
-
From the Dashboard, click the URL that appears below your site image:
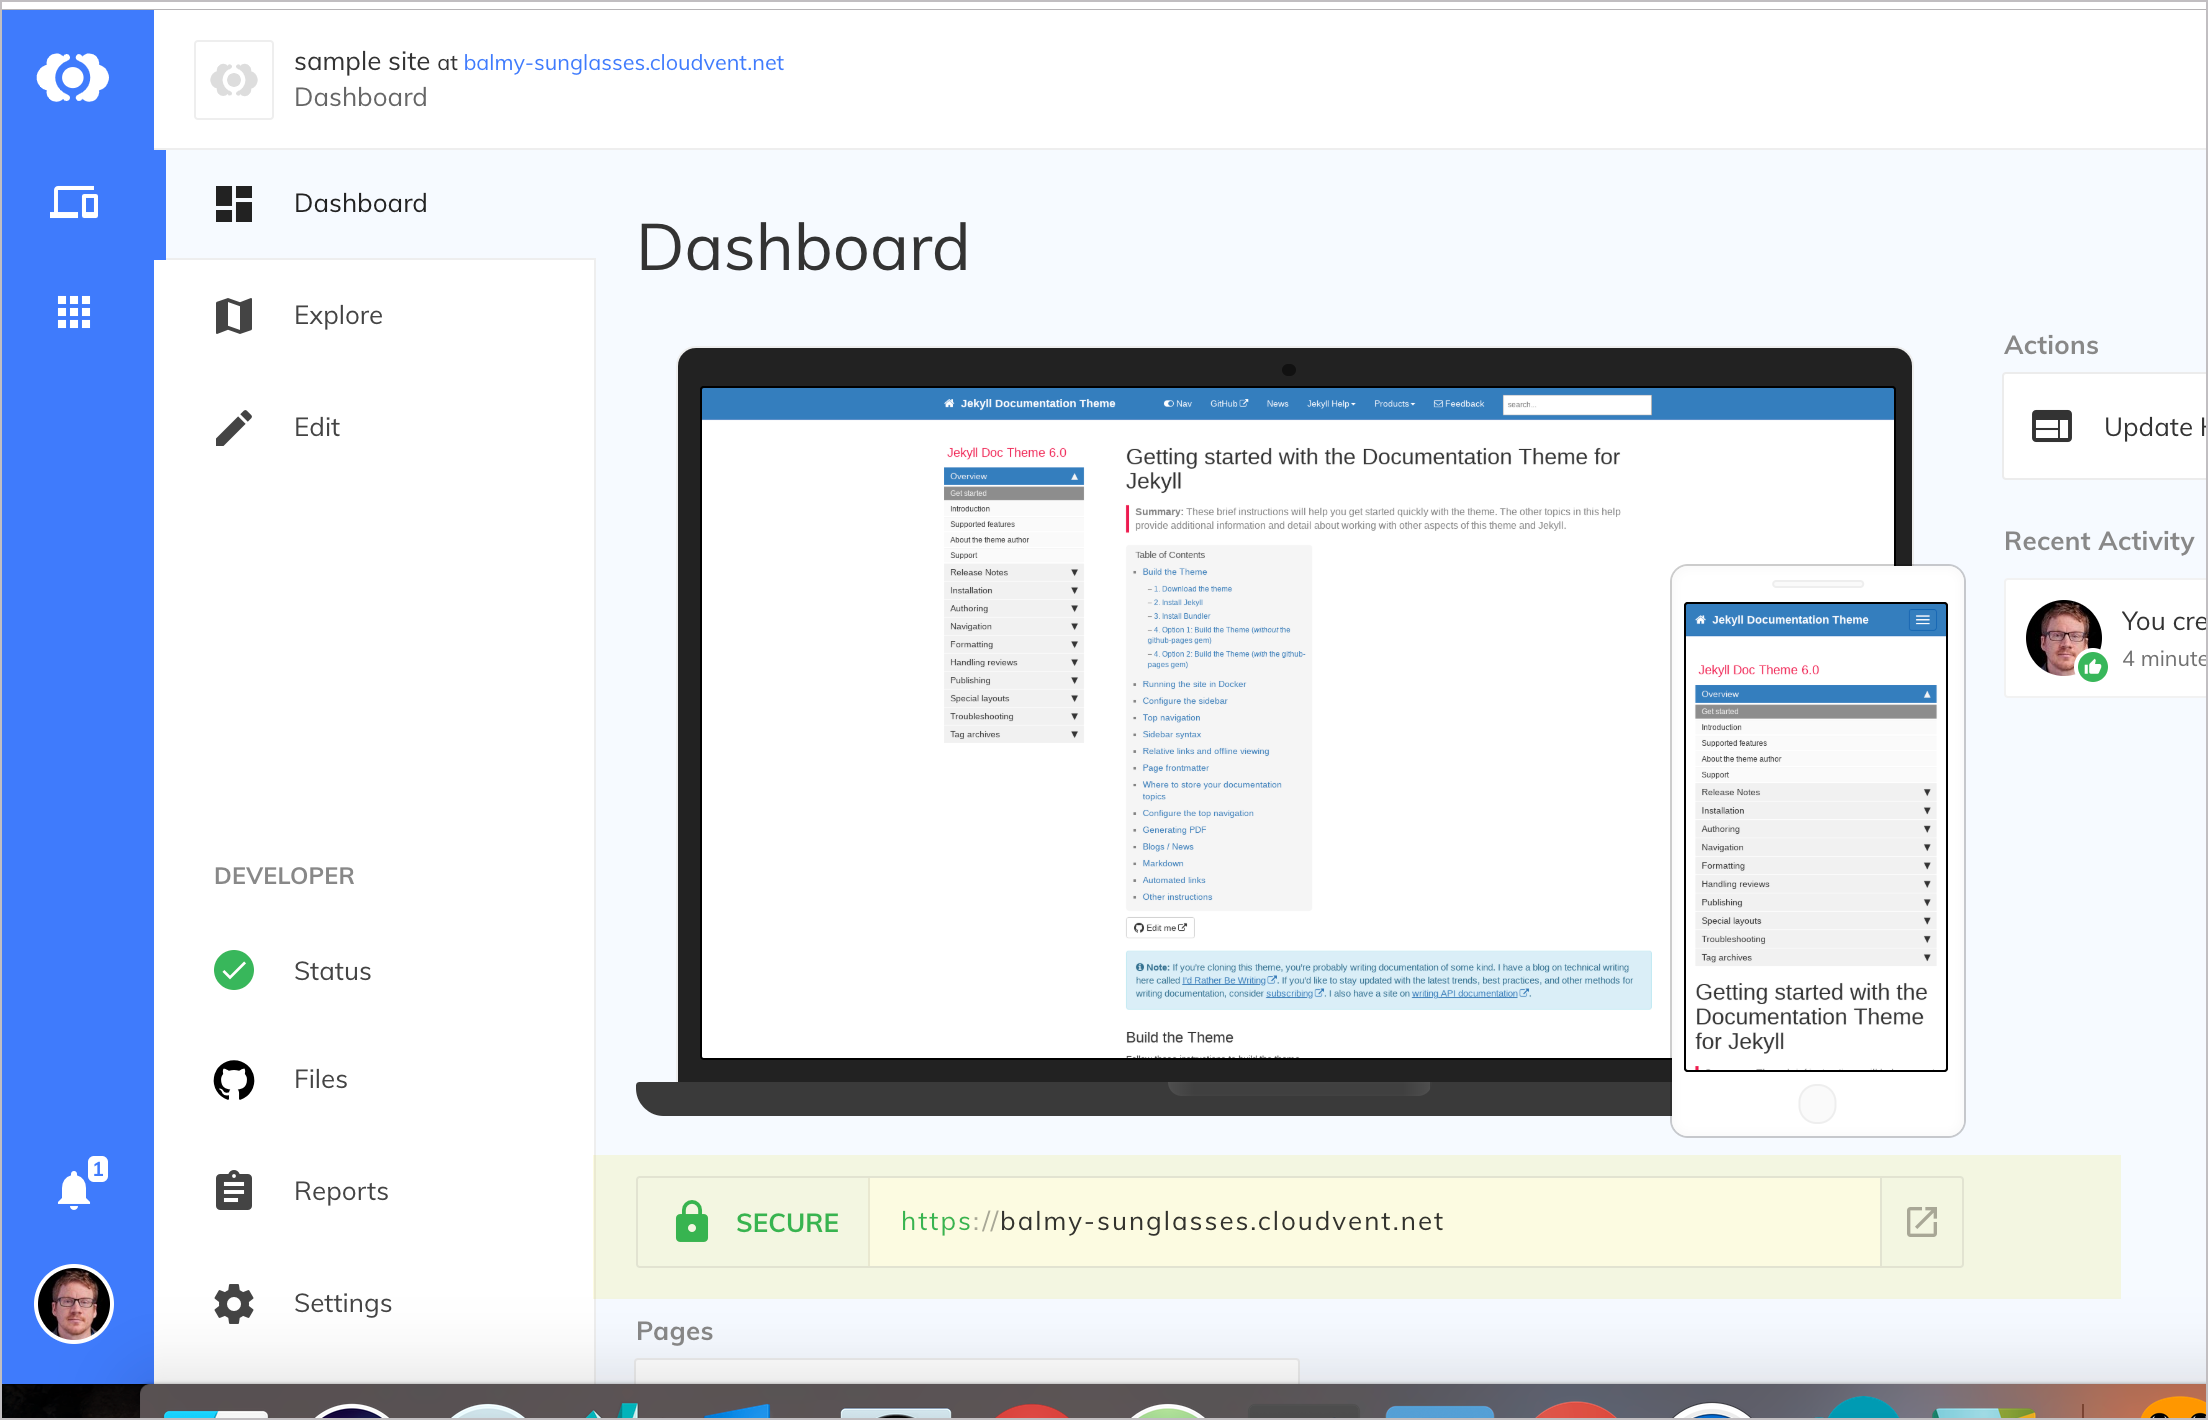
Viewing your live site The preview URL will be something random, such as
https://balmy-sunglasses.cloudvent.net/. You’ll need to click Continue to sample site because you’re on the free plan. When you visit the URL, the theme should look just like the Documentation theme for Jekyll here.
Using the CloudCannon user interface, you can make updates to files, and the updates will sync back to GitHub. Likewise, if you push updates to GitHub, CloudCannon will be notified, pull the changes, and rebuild the output.
The integration between CloudCannon and GitHub is pretty mind-blowing. Through CloudCannon, you can offload all the hassle of hosting and maintaining your website, but you aren’t locked into the system in a proprietary way. Your content lives in a custom Jekyll theme on GitHub.
CloudCannon automatically builds the site when you commit new updates to your GitHub repo, entirely removing the publishing and deployment step with a website. CloudCannon also provides additional features for authentication, metrics, suggested improvements, and more.
The only drawback with CloudCannon is that your company must allow you to host documentation content on GitHub. Also, CloudCannon charges a monthly fee (see their pricing). If you need to make a case for third-party hosting, I recommend doing so by analyzing the costs of internal hosting and maintenance.
If cost is an issue and you don’t have any privacy restrictions around your docs, consider using GitHub Pages instead. GitHub Pages also gives you continuous integration delivery for GitHub projects, and it’s free.
Make an update to your Github repo
When you connect a GitHub repo with CloudCannon, the two sites sync the files. Let’s see that workflow in action.
-
In your browser, on GitHub, go to your Github repository that you forked and make a change to a file.
For example, browse to the index.md file, click the pencil icon (“Edit this file”), make an update, and then commit the update.
-
Return to CloudCannon and observe that your site automatically starts rebuilding.
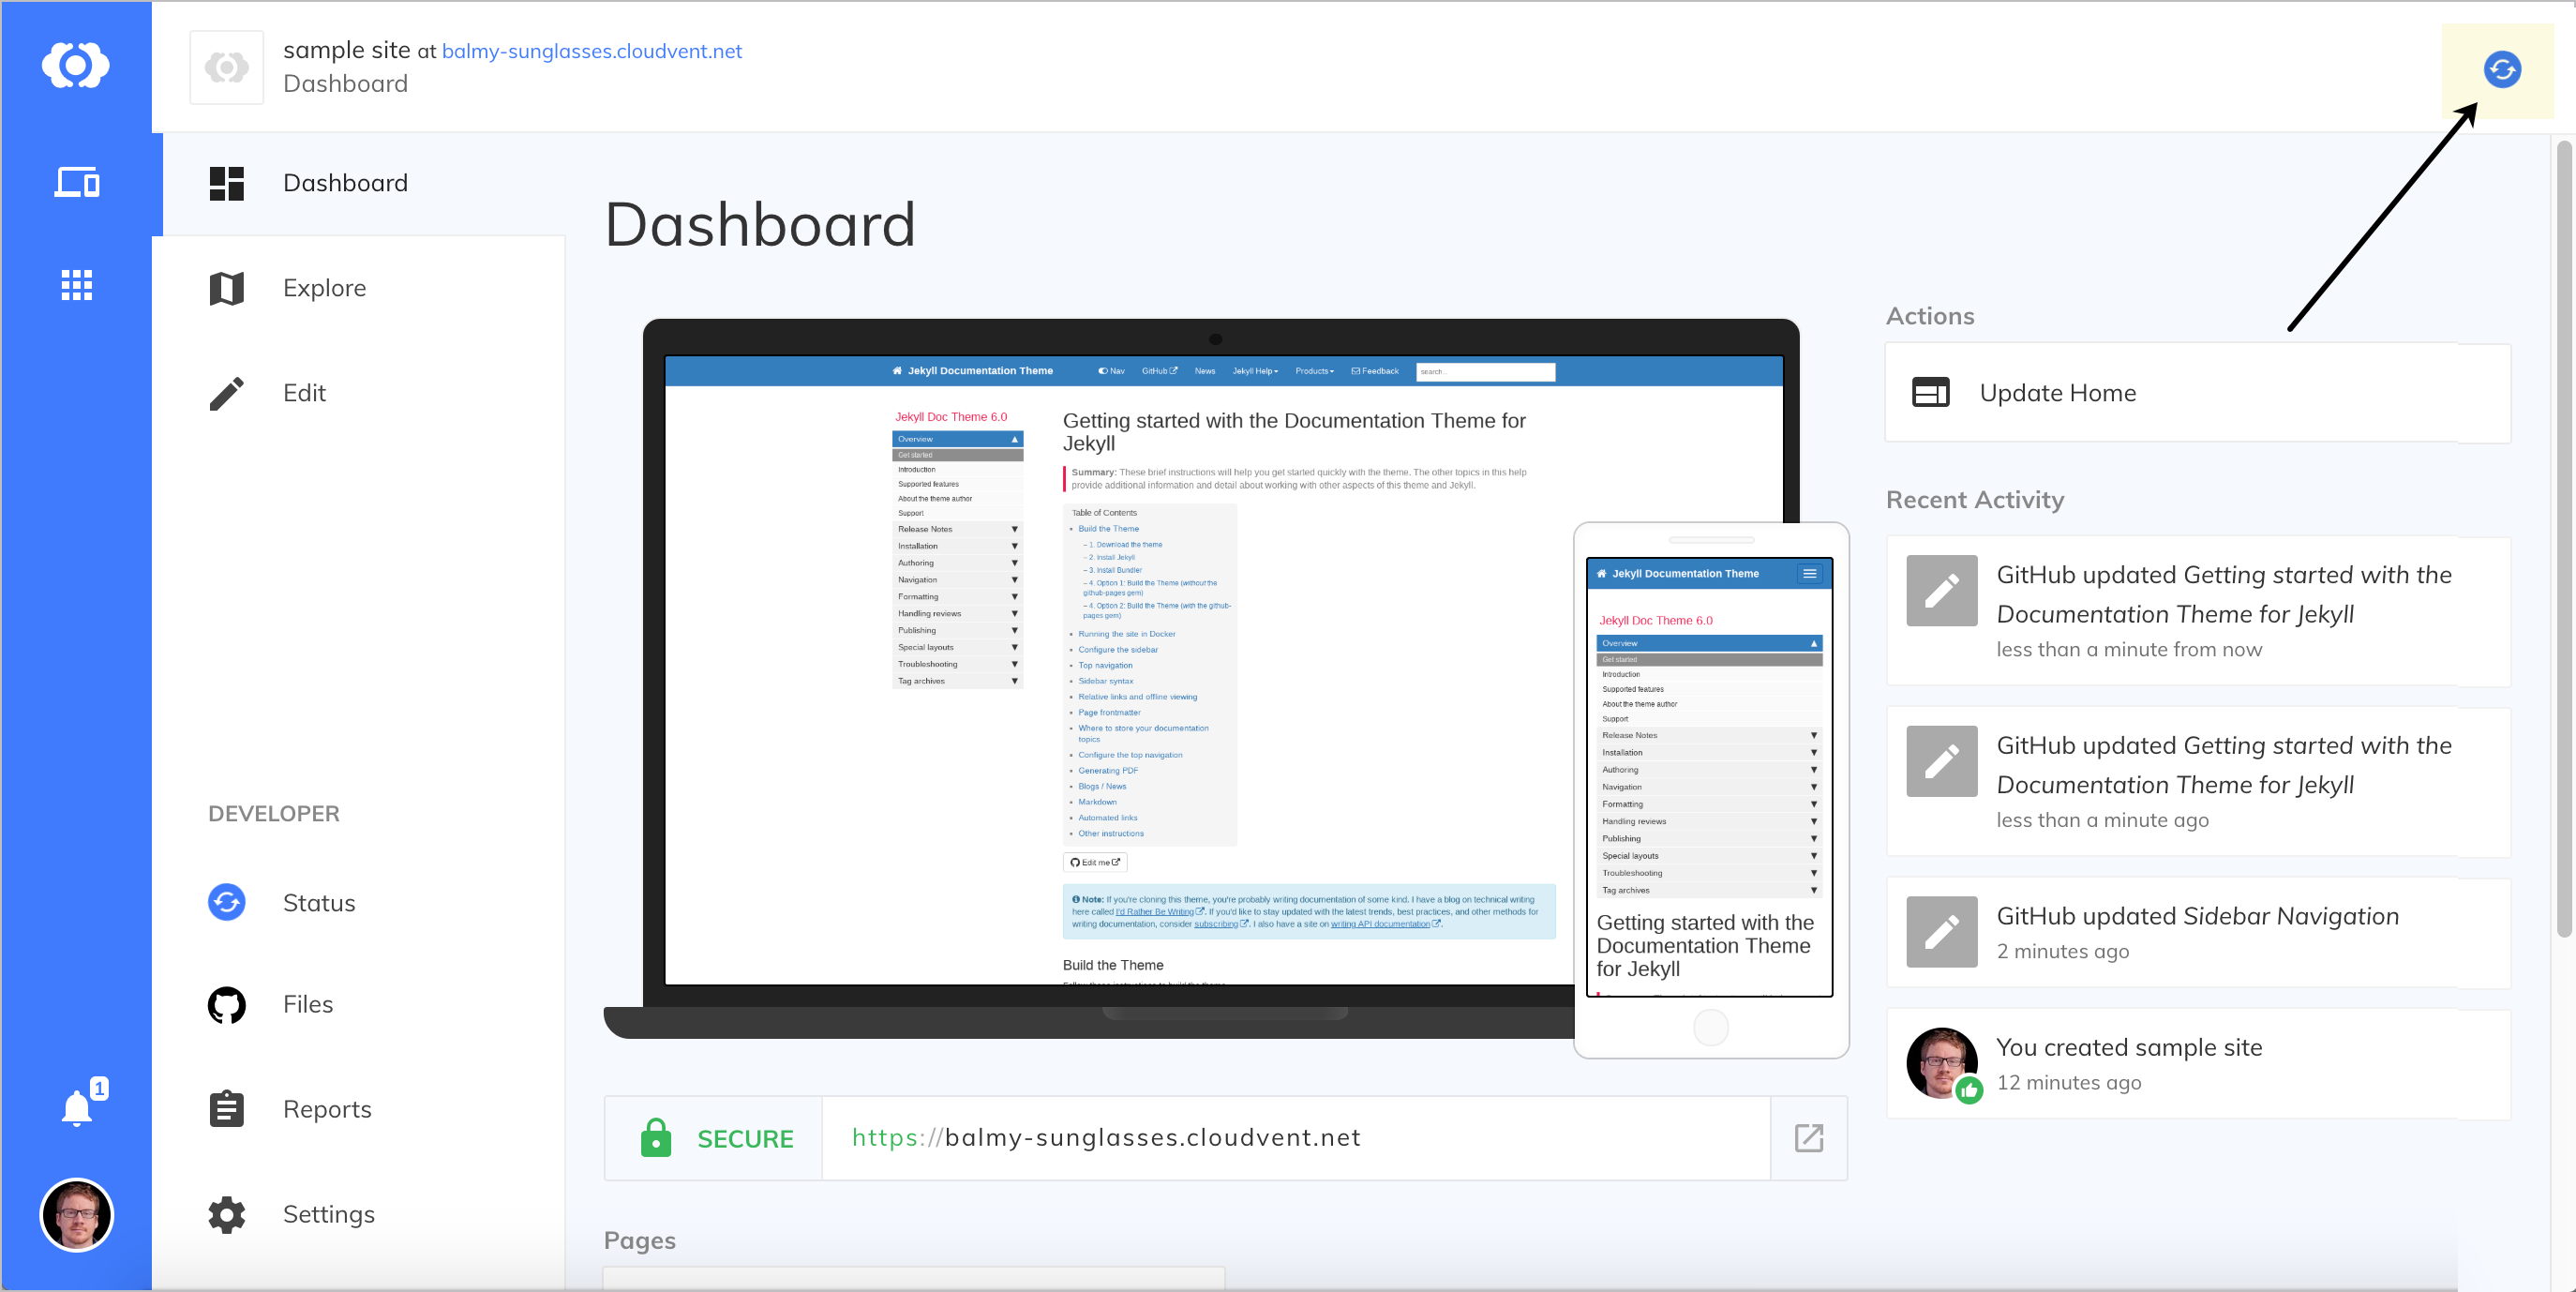
CloudCannon detects the change and automatically rebuilds Jekyll
Wait until the build finishes (the blue circling arrows change into a green check mark), and then look for the change at the preview URL. The change should be reflected.
You’ve now got a workflow that involves Github as the storage provider syncing to a Jekyll theme hosted on CloudCannon. You’re publishing on the fly, based on commits to a repo. This continuous publishing based on Git commits is the essential characteristic of a docs-as-code publishing workflow.
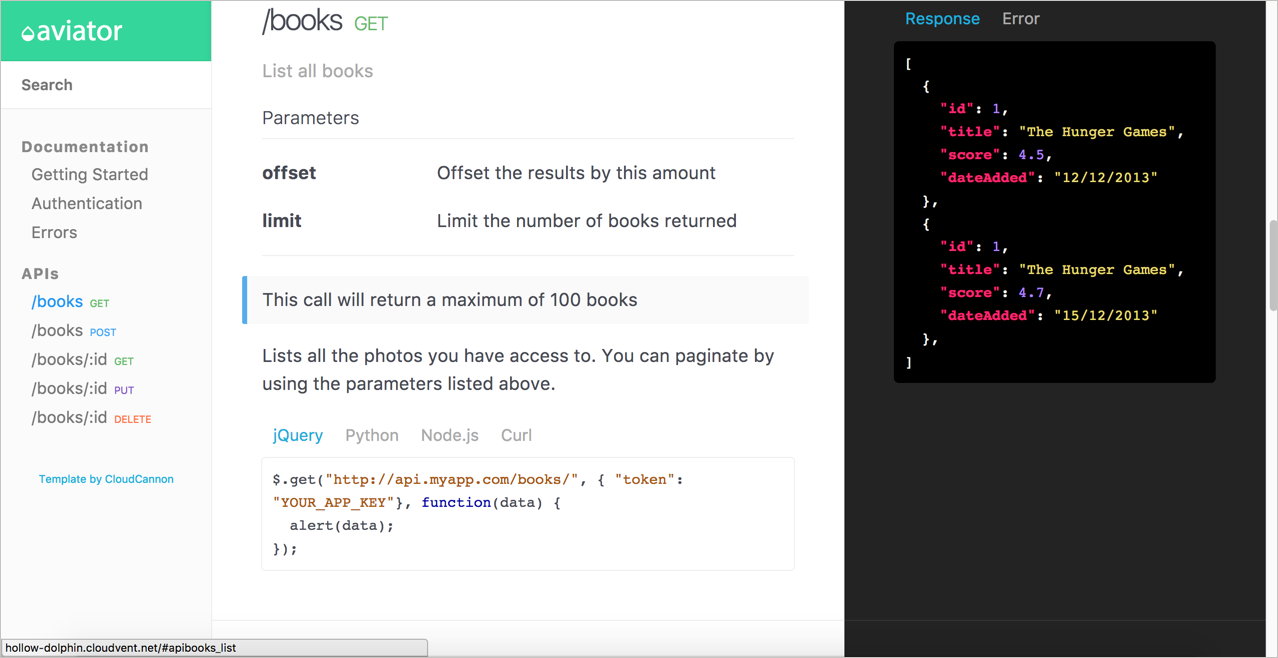
The Jekyll Aviator theme
My Jekyll documentation theme is just one possibility for a Jekyll site. (Most people who use it end up heavily customizing it for their needs.) You could also use this Aviator API documentation theme, which has some API templating built-in, or you could choose from many other Jekyll themes. I also wrote a tutorial for creating your own Jekyll theme, likely using your company’s site as the template.
For inspiration, here are some websites using Jekyll:
- Bootstrap
- Stack Overflow blog
- RethinkDB
- Github docs
- Basekit
- Jekyllrb docs
- SendGrid docs
- Atlassian Design
- CloudCannon docs
- Wistia help center
- Liquid (Shopify)
- devo.ps documentation
- healthcare.gov
About Tom Johnson

I'm an API technical writer based in the Seattle area. On this blog, I write about topics related to technical writing and communication — such as software documentation, API documentation, AI, information architecture, content strategy, writing processes, plain language, tech comm careers, and more. Check out my API documentation course if you're looking for more info about documenting APIs. Or see my posts on AI and AI course section for more on the latest in AI and tech comm.
If you're a technical writer and want to keep on top of the latest trends in the tech comm, be sure to subscribe to email updates below. You can also learn more about me or contact me. Finally, note that the opinions I express on my blog are my own points of view, not that of my employer.
112/168 pages complete. Only 56 more pages to go.